
Hello! Popping in here to share something I've been working on. A twist on the stitching dies if you will. And one that I'll be doing again and again. If you want an alternative to felt, this is something you're going to want to check out.
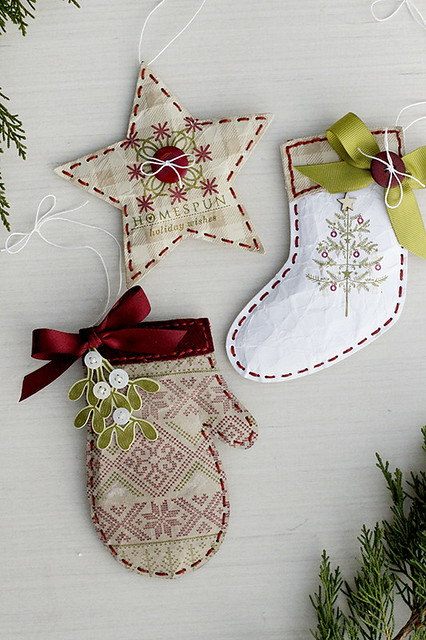
Here's a trio of ornaments using the new "puffy paper" technique. All three shapes are from my Beaded Holiday Stitch Kit. You still have time before the big day to make some of your own and the kit is still available.
The trick here is that you have a back and front of the ornament that is made with stamped, crinkled card stock. By crushing and wrinkling the card stock (I used all Papertrey Ink card stock), you make the paper more pliable and soft. And that allows you to stuff it with layers of fleece batting. The paper is more likely to stretch over the bulk. The results are thick (between 3/8" and 1/2" thick in the middle), soft and velvety to the touch, and lofty with a homespun look that can be stamped on! Bringing stamping into this makes it super fun and is a fantastic new way to use your stitching dies.
The steps to making the puffy paper ornaments are as follows:
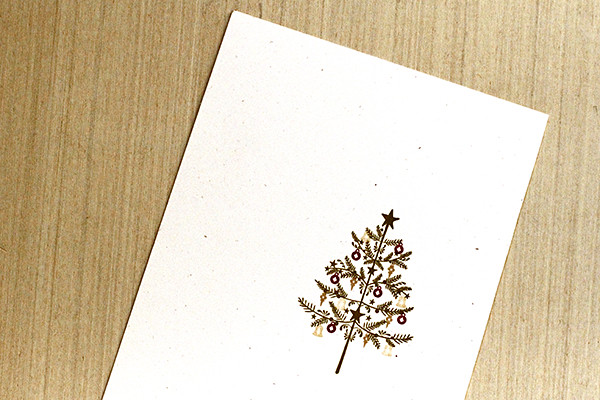
Step 1: Stamp your chosen design onto Papertrey Ink cardstock. Rustic White or Rustic Cream are really nice choices for the homespun look.
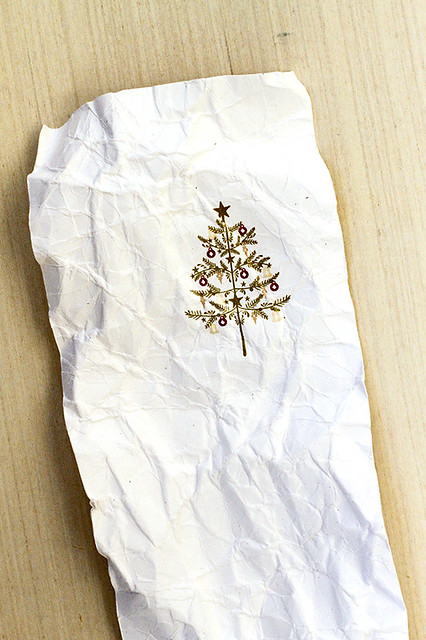
Step 2: Crinkle the cardstock with your hands. Really work it. Wad into a ball and then flatten. Repeat a few times, trying to wad it up in a different direction to create new wrinkles.
Step 3: Die cut your shape. You'll need a front and back. The backside has to be a "mirror" of the front. That means you cut on the opposite side of your paper for the back of your ornament. Doesn't matter much here since this is cardstock. But if you are using patterned paper, it is something you need to pay attention to.
Fortunately, since the paper is so distressed already, a scratched up plate on your die cut machine isn't going to negatively effect your piece. Those scratch marks actually add to the design.
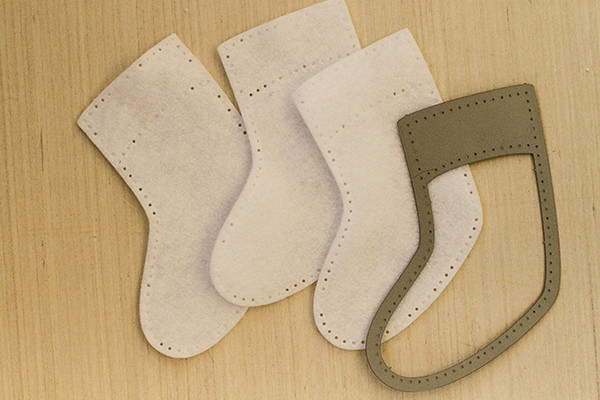
Step 4: Using the same shape, die cut three layers of fleece batting. As you can see, it cuts just fine. Not worried about the stitching holes. We'll be cutting those off.

This is the fleece I used. Bought it awhile ago. It does say "fusible", which is not something you need for this project. But it might be nice to buy it anyway. If you do need to iron fabric to it so have "lofty", die cuttable fabric, it is nice have the option. I think I originally bought it to see if I couldn't make quilted coasters using the Stitched Coaster Dies. Might still give that a whirl.
Notice the price. $8.95 a yard. Even cheaper with a sale or a coupon. Makes these puffy paper ornaments very economical.
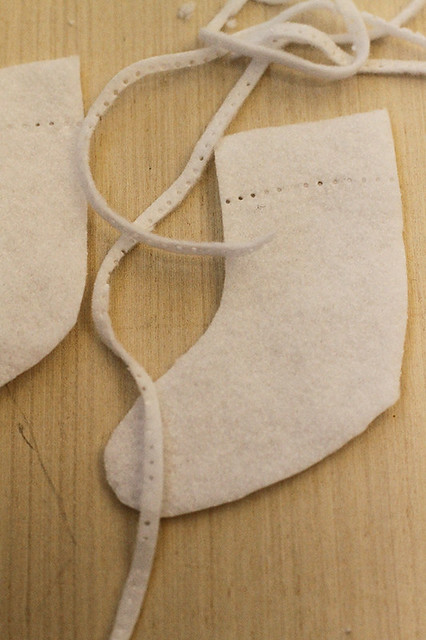
Step 5. With a pair of scissors, trim off the edges of your fleece cuts, about 1/16"-1/8" inside the holes. You just want the middle of your project to be puffy, not the edges. You get a better "stitched sealed edge" if you stitch paper surface to paper surface.
Step 6: Stitch the back and front of your ornament together, with the three layers of fleece sandwiched inside.
Step 7: Embellish as desired.
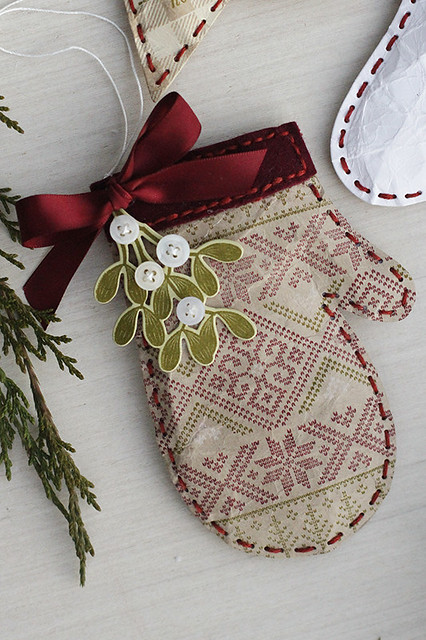
I made a mitten from the Beaded Holiday Stitch Kit and stamped Classic Kraft cardstock with Fair Isle Borders in shades of Ripe Avocado, Fresh Snow, and Scarlet Jewel. I did add a little touch of felt with the cuff and as textural touch. The Merry Kiss-mas stamp set and dies is used for embellishment. I added button "berries". A Scarlet Jewel Ribbon finishes this one off.

For the Beaded Stitched Stocking from the Beaded Holiday Stitch Kit, I added a tree and wooden star from the Wee Folk Holiday Make It Market Mini Kit. Super Gingham stamped in Classic Kraft on Fine Linen makes up my cuff.
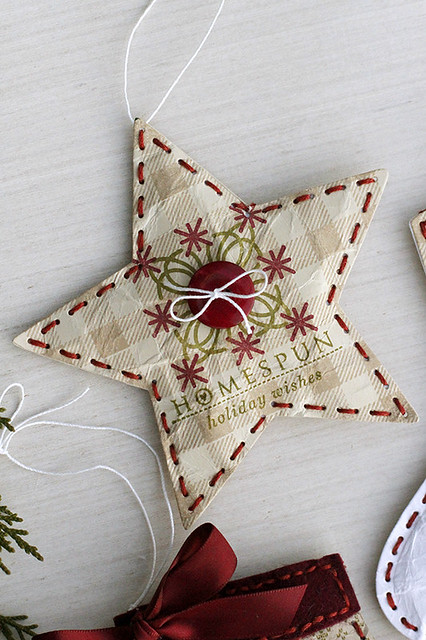
And lastly, the Beaded Stitched Star from the Beaded Holiday Stitch Kit. Again, I stamped Super Gingham in Classic Kraft onto Fine Linen cardstock. I added a design with Chicken Scratch (Chicken Scratch Project #18), and a sentiment from Love Lives Here Holiday.
Love Lives Here Holiday is really a great companion stamp set to this technique. Really goes hand in hand with the look of these. Will be making some more with this combination.
On all three, I did a simple basting stitch. It goes with the homespun look and makes these really quick to sew together. Using the same color of floss with all three ornaments ties them together visually as a set.
I hope you give the puffy paper ornaments a try. Really fun to bring the stamping and the stitching together for something that is durable and lasting. I know you'll love them as much as I do.
Off to start another project! Busy, busy.
Erin, these are amazing! My favorite is the stocking. I love the Fair Isle look.
ReplyDeleteErin, Thank you for sharing, these are beautiful! What type of needle did you use for the stitching?
ReplyDeleteJust a regular sewing needle. For these in particular, I'm using the full six strands of floss. So you're going to want to make sure you can get all six strands through the eye easily. Good luck!
DeleteThanks so much for sharing these, Erin! I love to get new ideas for my dies! I think I like these just as much as the felt ones!
ReplyDeleteThese are adorable, Erin!
ReplyDeleteErin ,these look great!!!!!! Love them made out of paper!!!!!!! TFS
ReplyDeleteOh Erin, I tried so hard not to order this darling kit. But your samples today put me over the top.
ReplyDeleteSome friends and I are having a diy party on Sat., and this is just perfect to share. I plan to take the kit, my cuttlebug, and let everyone have a go at cutting their own. The paper ornaments you did are just adorable, and I know It'll make a hit! Pray it arrives by Fri. for the Sat. party! Ha! Thank you for all the inspiration!!!
Let me know how you like it! Happy crafting. I promise you'll have a fantastic time at your party.
DeleteThis is great! If I don't have the batting...I am guessing felt could also work? I have some super cheap white felt. Since I have it in the house I may go for it. The ornaments are beautiful!
ReplyDeleteThat is a FANTASTIC idea. And one I'm going to use. Great thinking.
DeleteThese are just sweet and adorable! So glad you shared; I often enjoy your blog.
ReplyDeleteMerry Christmas.
These are just sweet and adorable! So glad you shared; I often enjoy your blog.
ReplyDeleteMerry Christmas.
Erin I love everything you share with this lovely kit! I hope you do mini kits with a new ornament shape each year in the future! It would be fun to make a new ornament shape each year as gifts, gift toppers and ornaments!
ReplyDelete