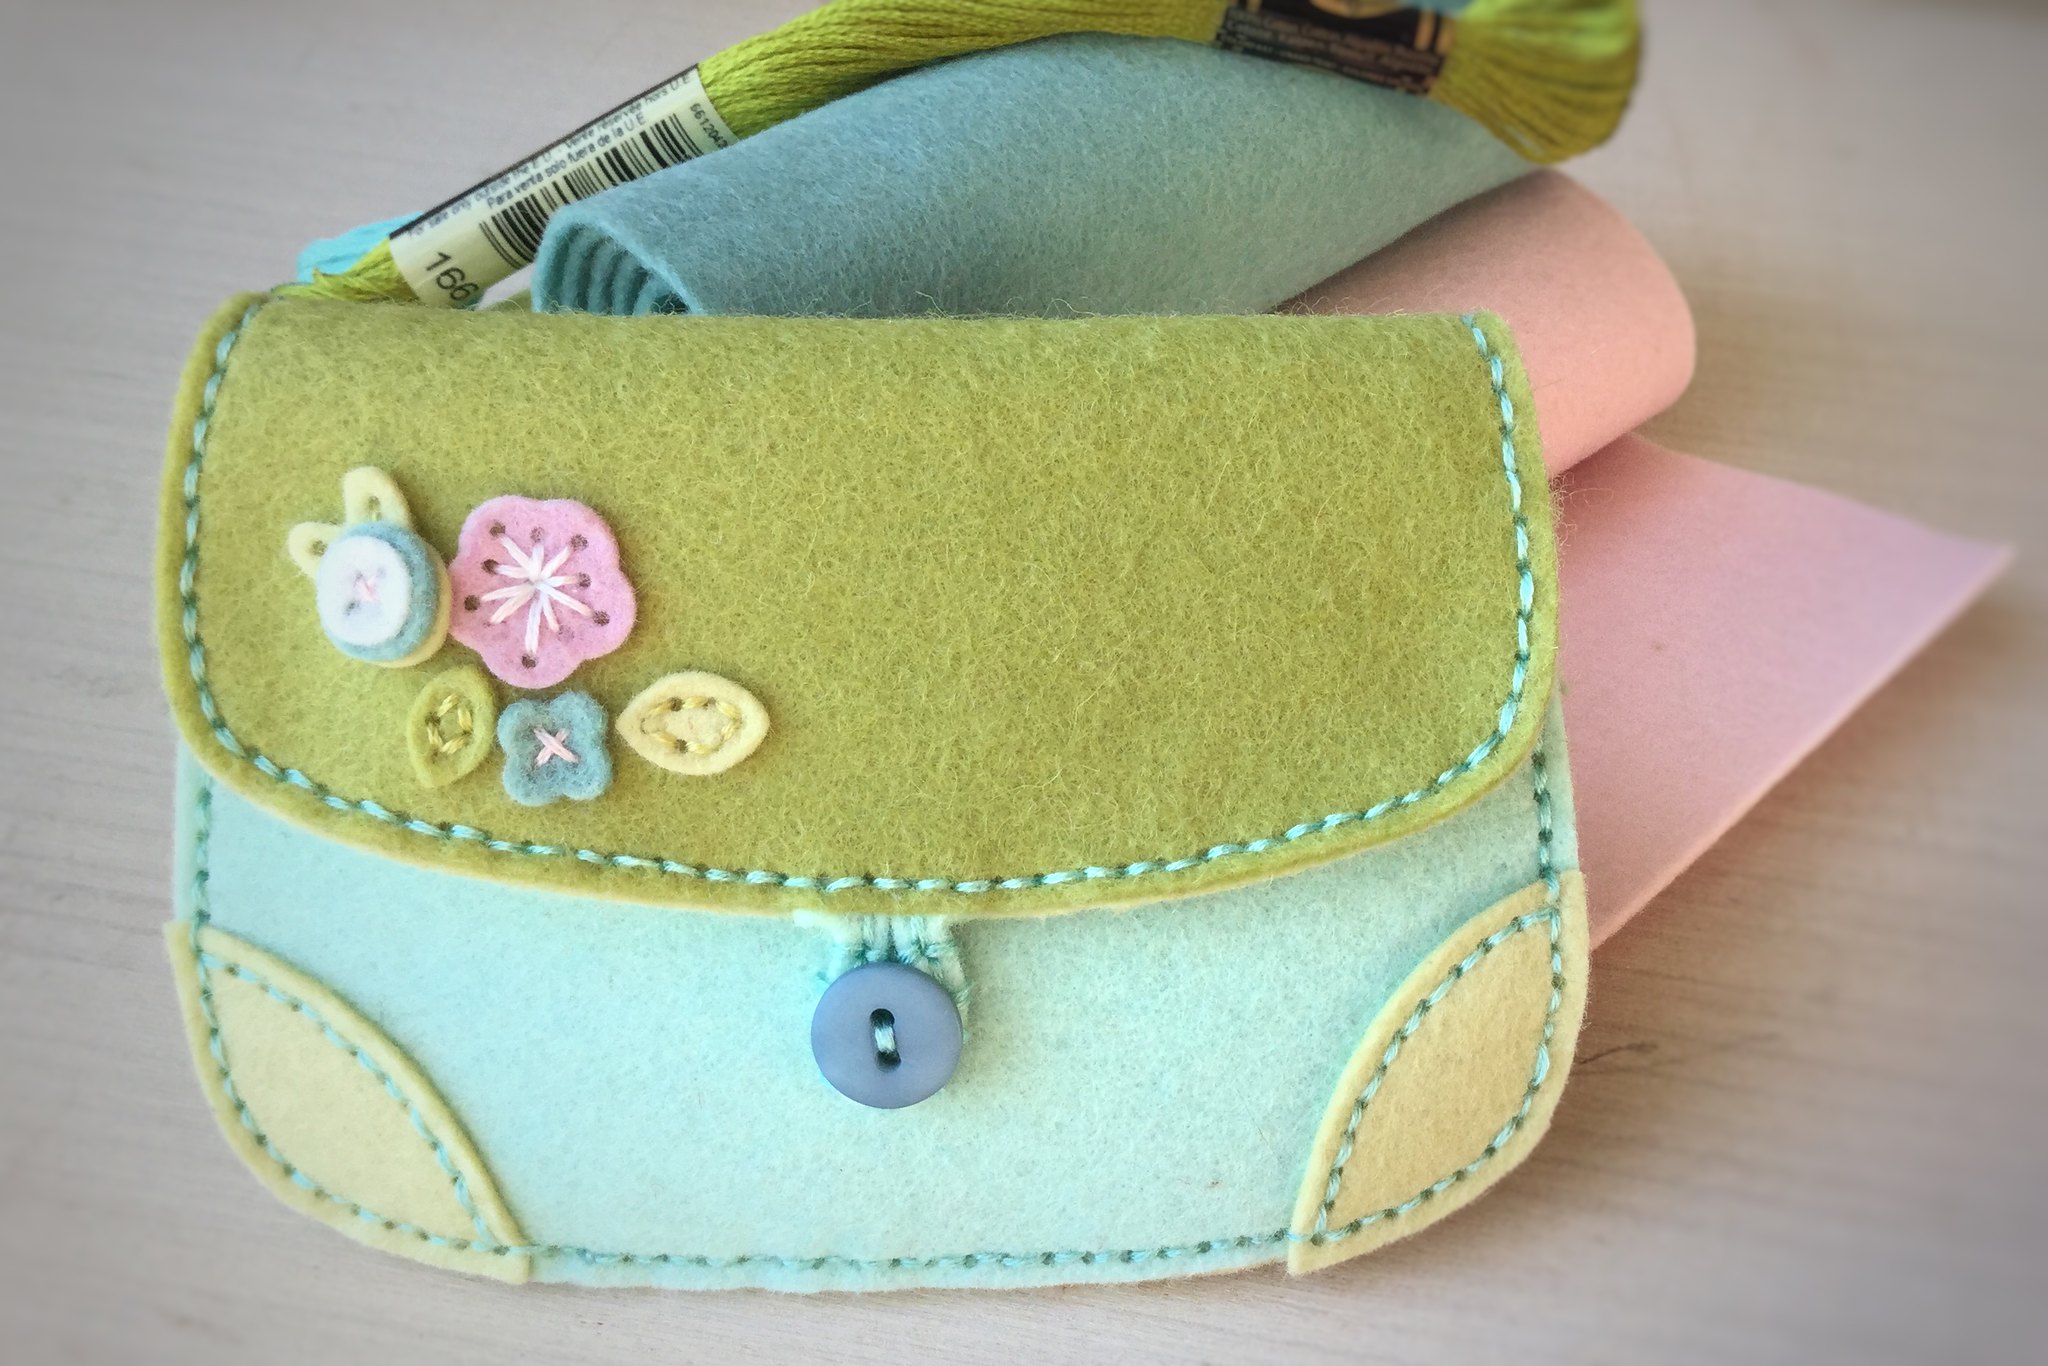
Here it is....a fold over flap with a button closure and contrasting patches. I used the Floral Cluster I Die to add decorative detail to both the outside and the inside....

The Seasonal Stitches: Ladybug out of Sweet Blush felt makes a sweet friend when you open up your purse.
Click below to view the tutorial video on how this comes together and how the button closure works.
Here's another Coin Purse II put together for you to give you an additional idea.
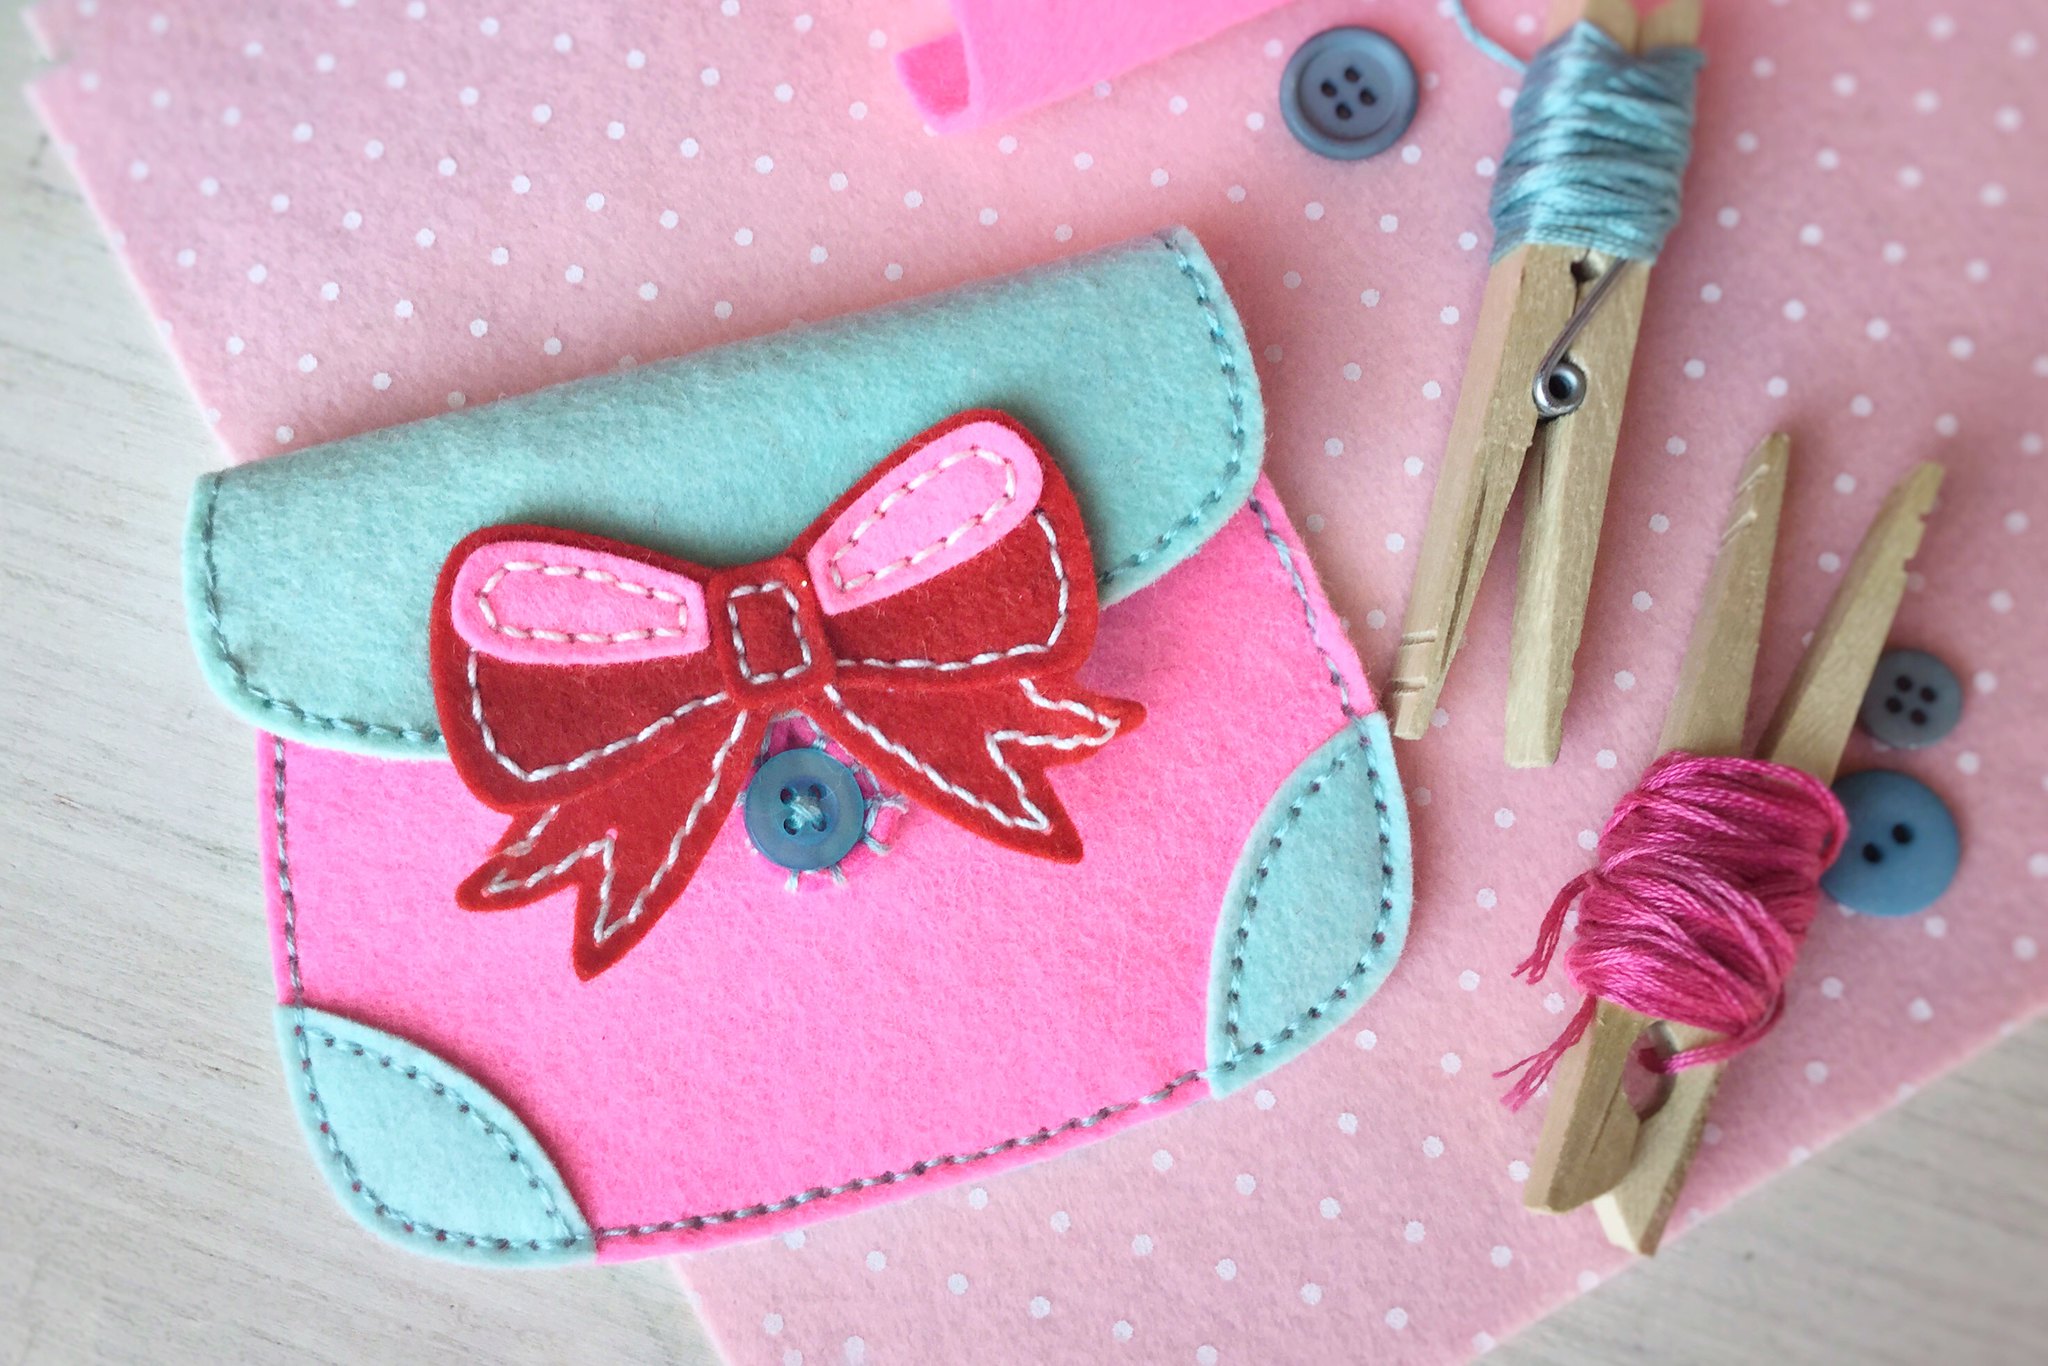
I found a completely done Seasonal Stitched: Bow laying around that was extra from a previous project. I hot glued it to the front of my Hibiscus Burst coin purse. I LOVE how nicely these two items go together.
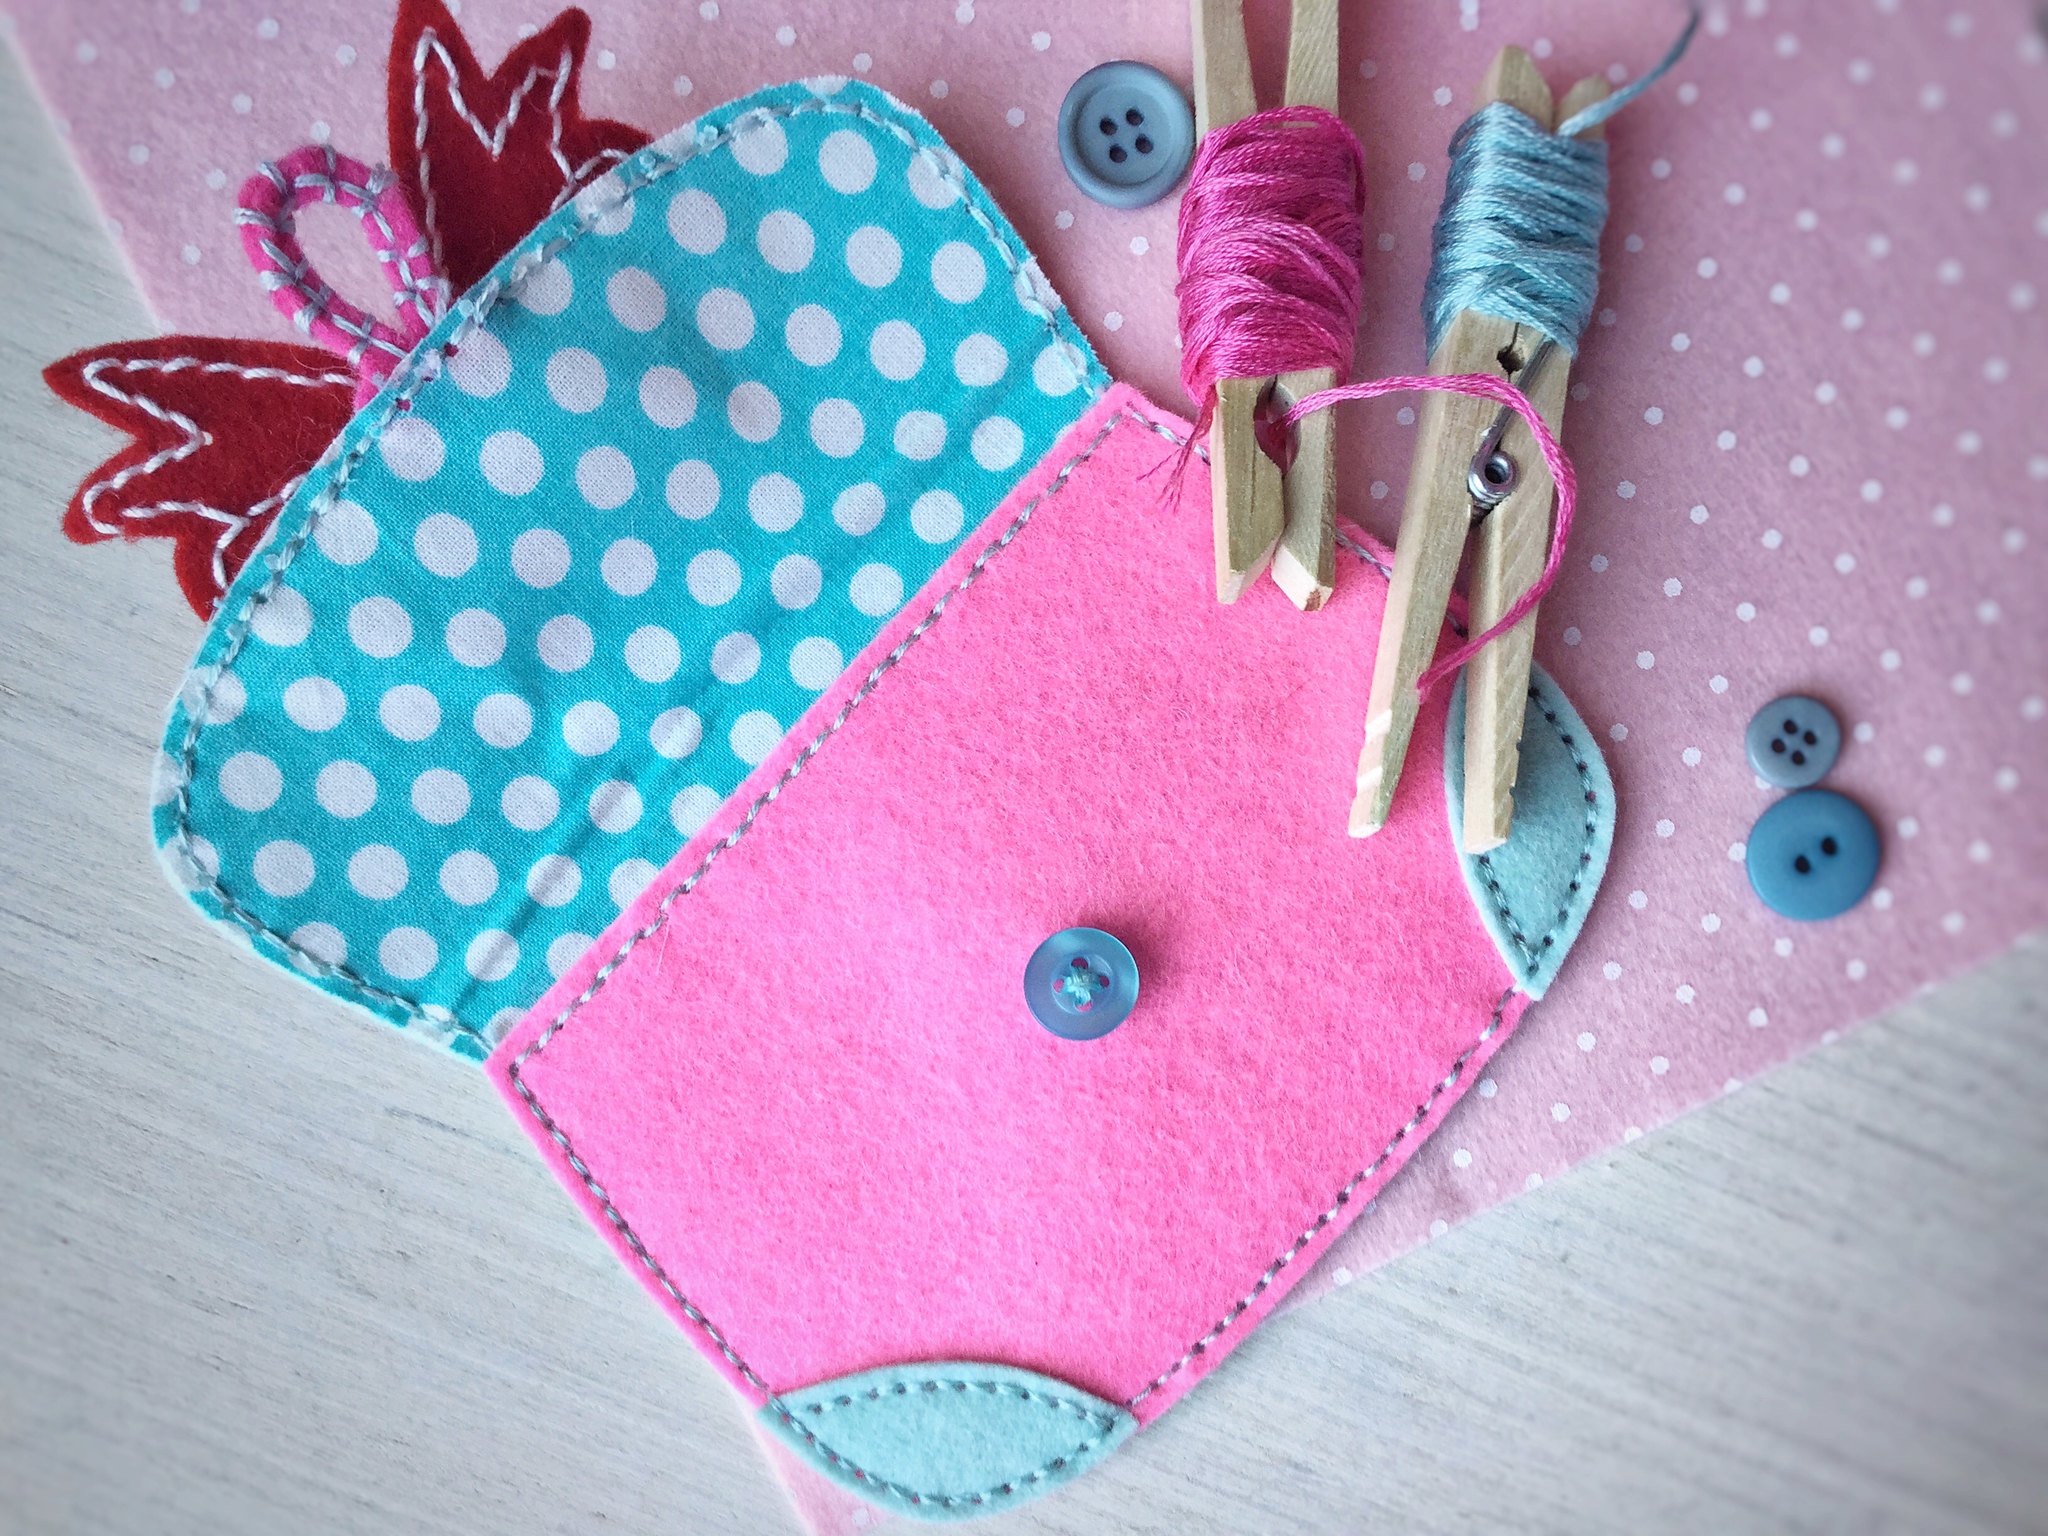
For the back inside lining, I used fabric treated with Heat N' Bond and cut with the die. Works just like the felt. Less bulk too. Love the burst of pattern when you open the coin purse.
A few tips just for quick reference when creating Coin Purse II Die projects:
- Only run your felt through your die cut machine with the die one time. If you do it more than once, you risk ripping the holes through the edge when your die jumps/bounces on your cutting plates.
- You need to use a button between 3/8" to 1/2" for the button loop that is included. Anything just over 1/2" will be too big.
- Use a small safety pin through both layers of felt for your stitch marker in the flap to prevent ripping out the stitching hole with the bulk of the safety pin. To be even more on the safe side, forgo the safety pin and just sew a loop of floss through that hole. It is easy to remove when you want to take it out with a snip of a pair of scissors.
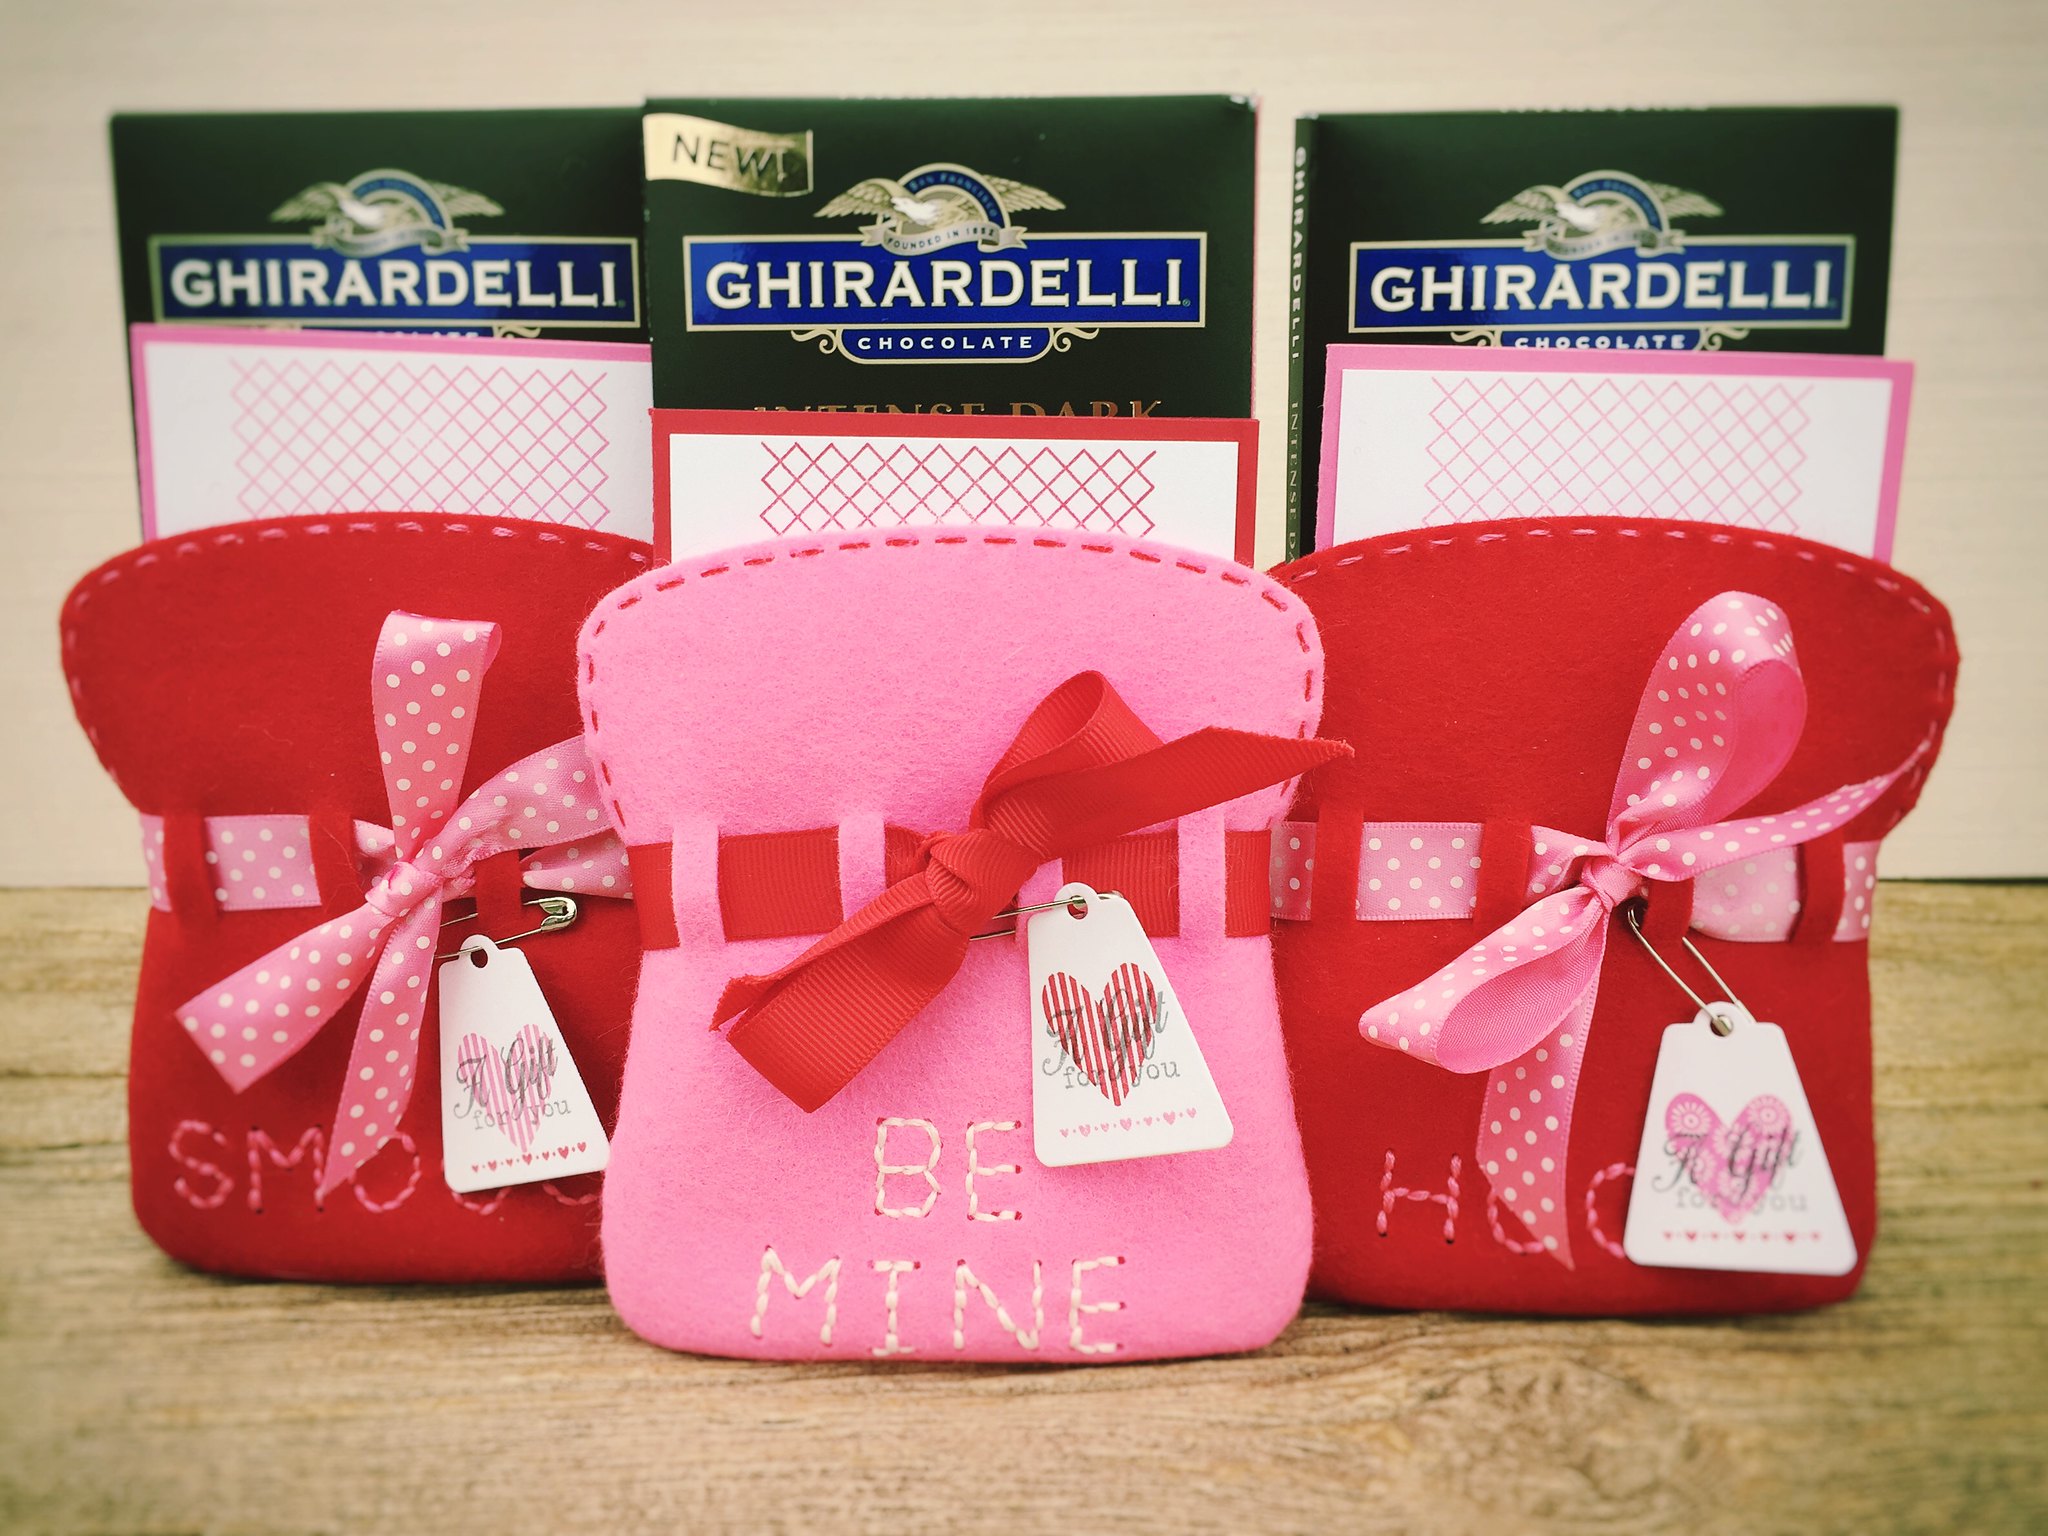
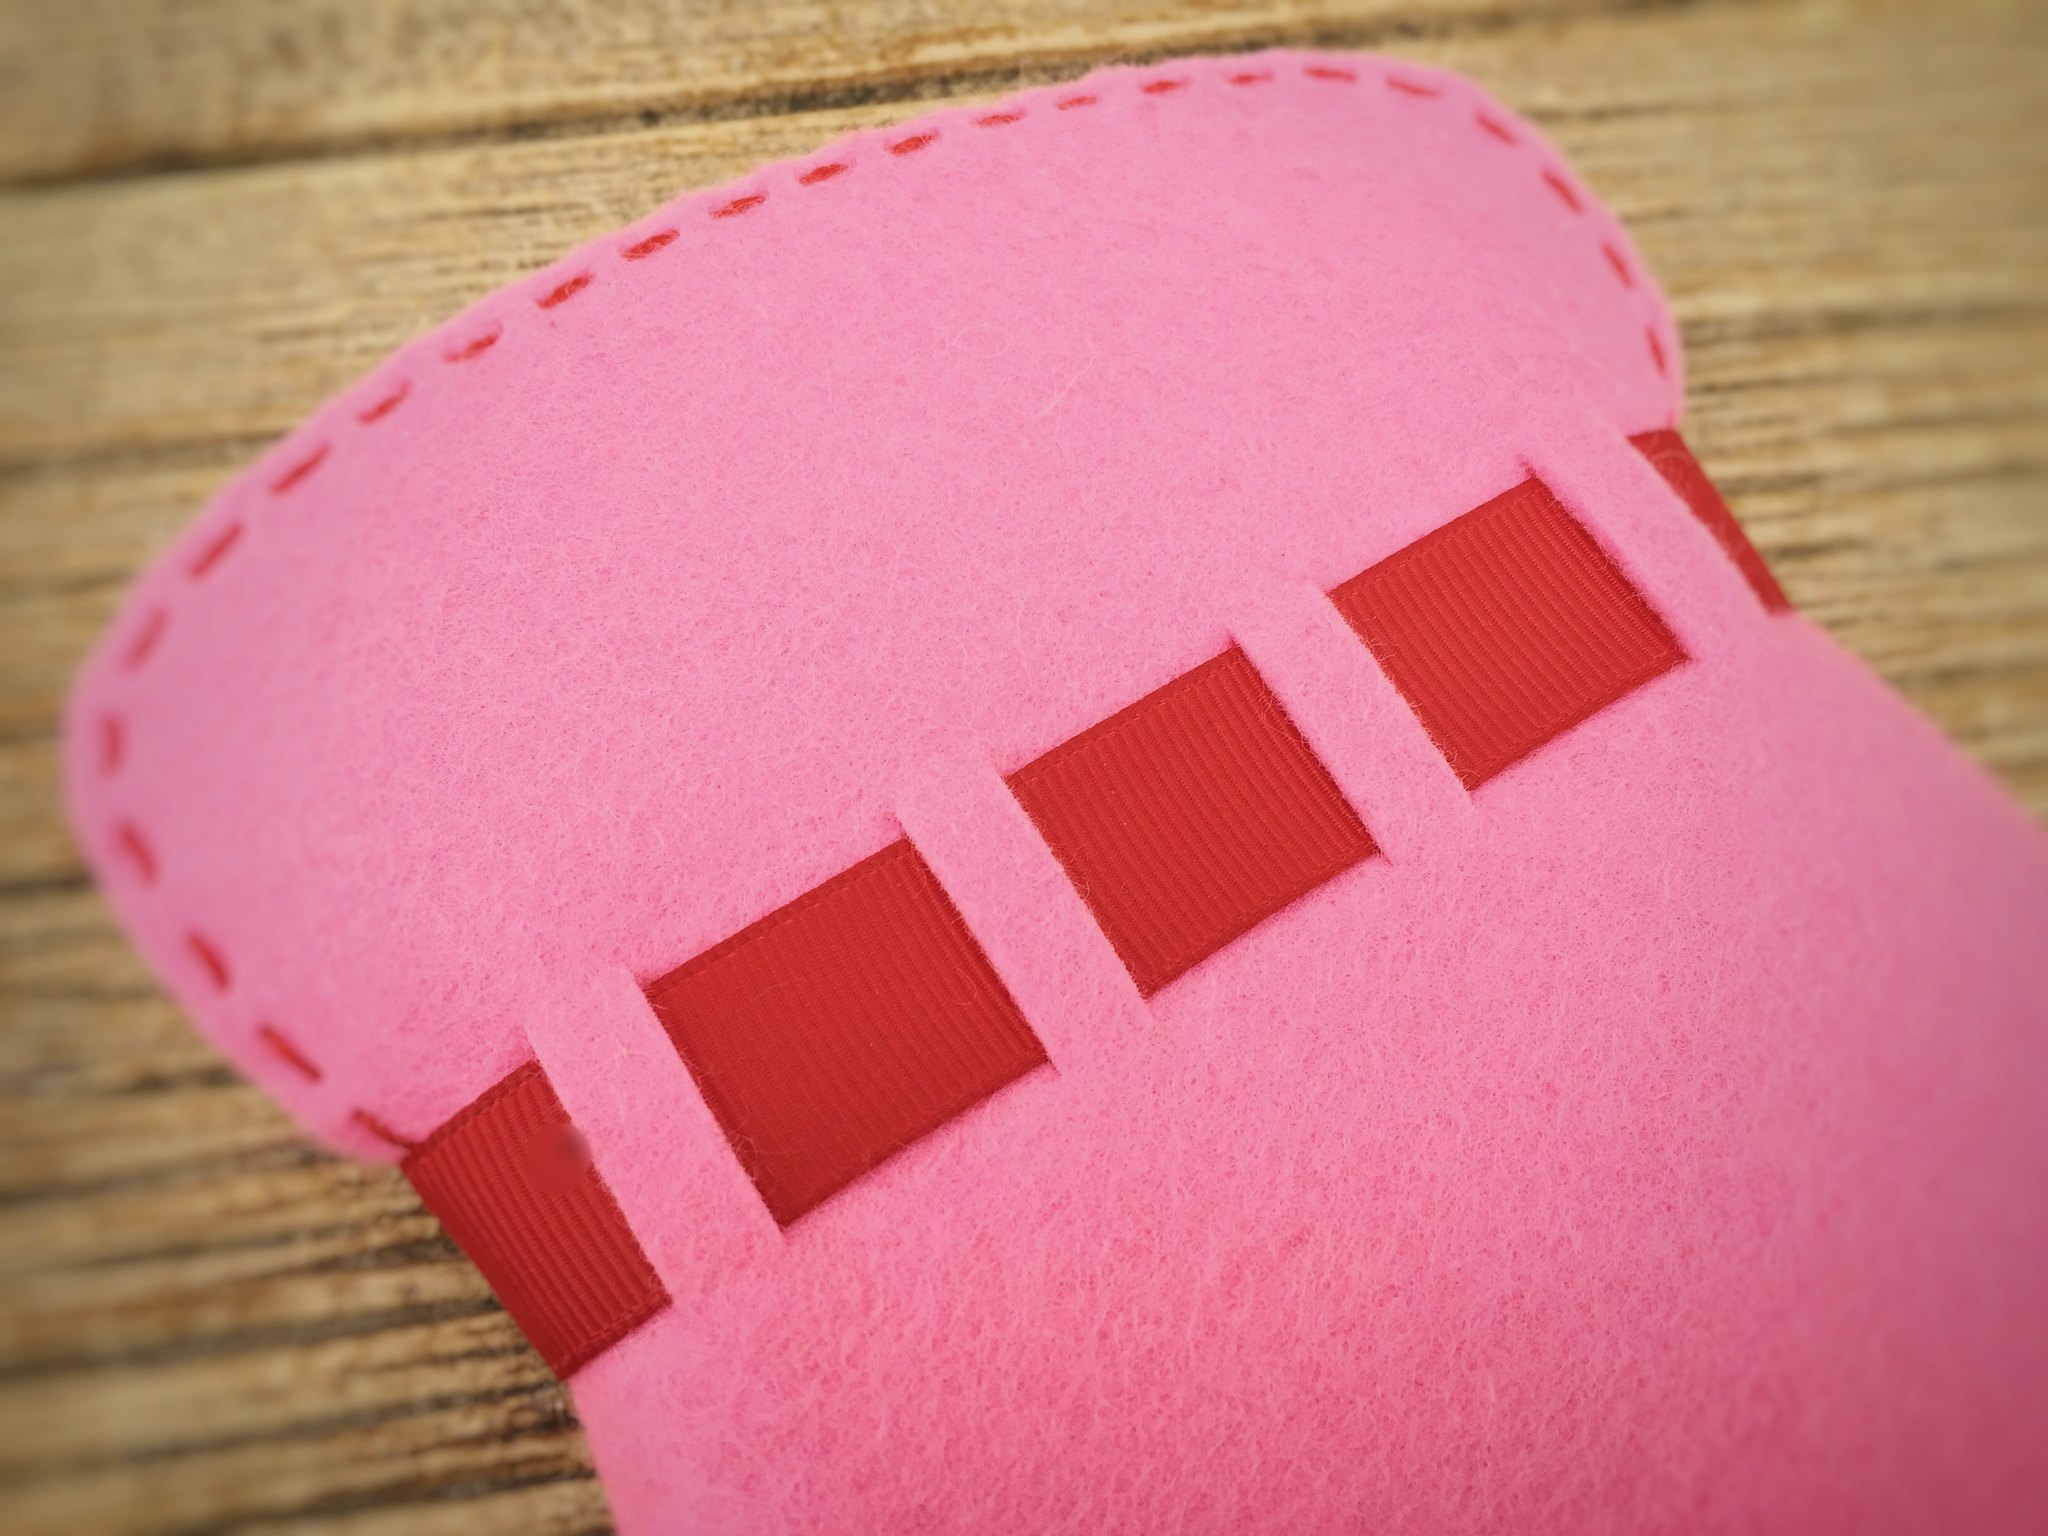
When I was originally designing the Coin Purse II Die, I realized I had a little room within the open die to play with. What else could I do? I ended up designing a single die that allows you weave in Papertrey Ink ribbon (sized just right for this!) and turns our coin purse into more of a drawstring sack/bag. I personally think this last minute idea is the main attraction! Love how this turned out!
Here's a great view of how the ribbon slot die works and the ribbon weaves in on the bag of my Valentine's Day sacks. So pretty. Ribbon is wrapped around the front and tied.
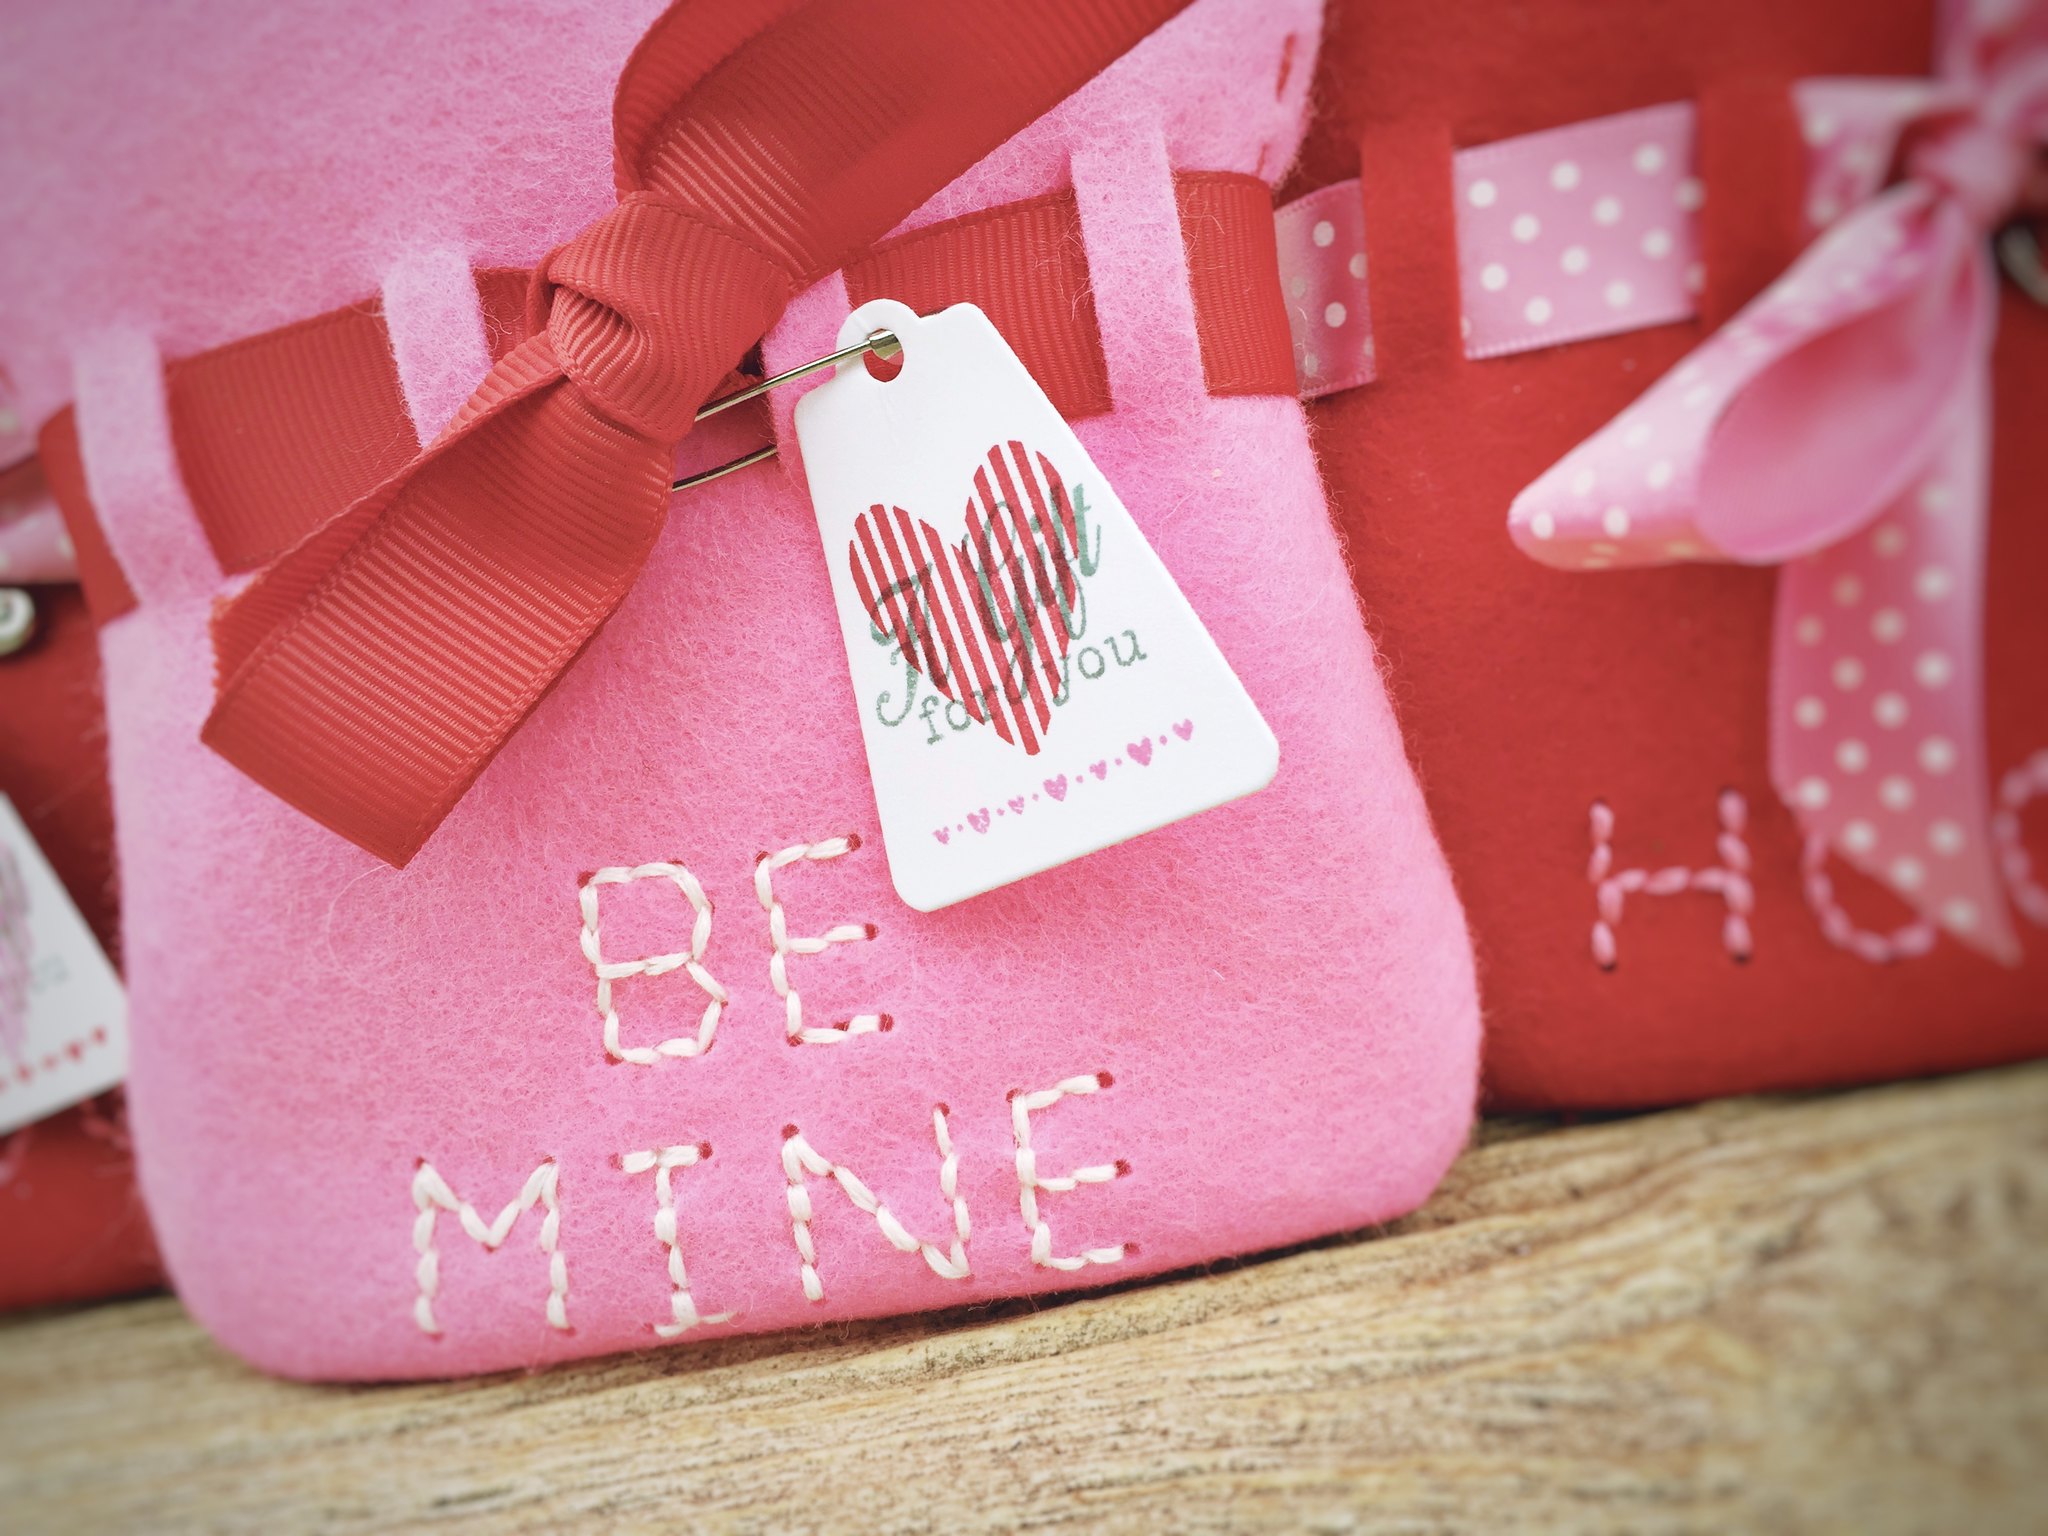
I've personalized the front of my bags with the Small Stitched Alphabet Die with some Valentine's Day sayings. A tag from the Christmas Tree Change Up Card Die Collection hangs off a loop with a safety pin. It is easily removable without having to untie the bow.
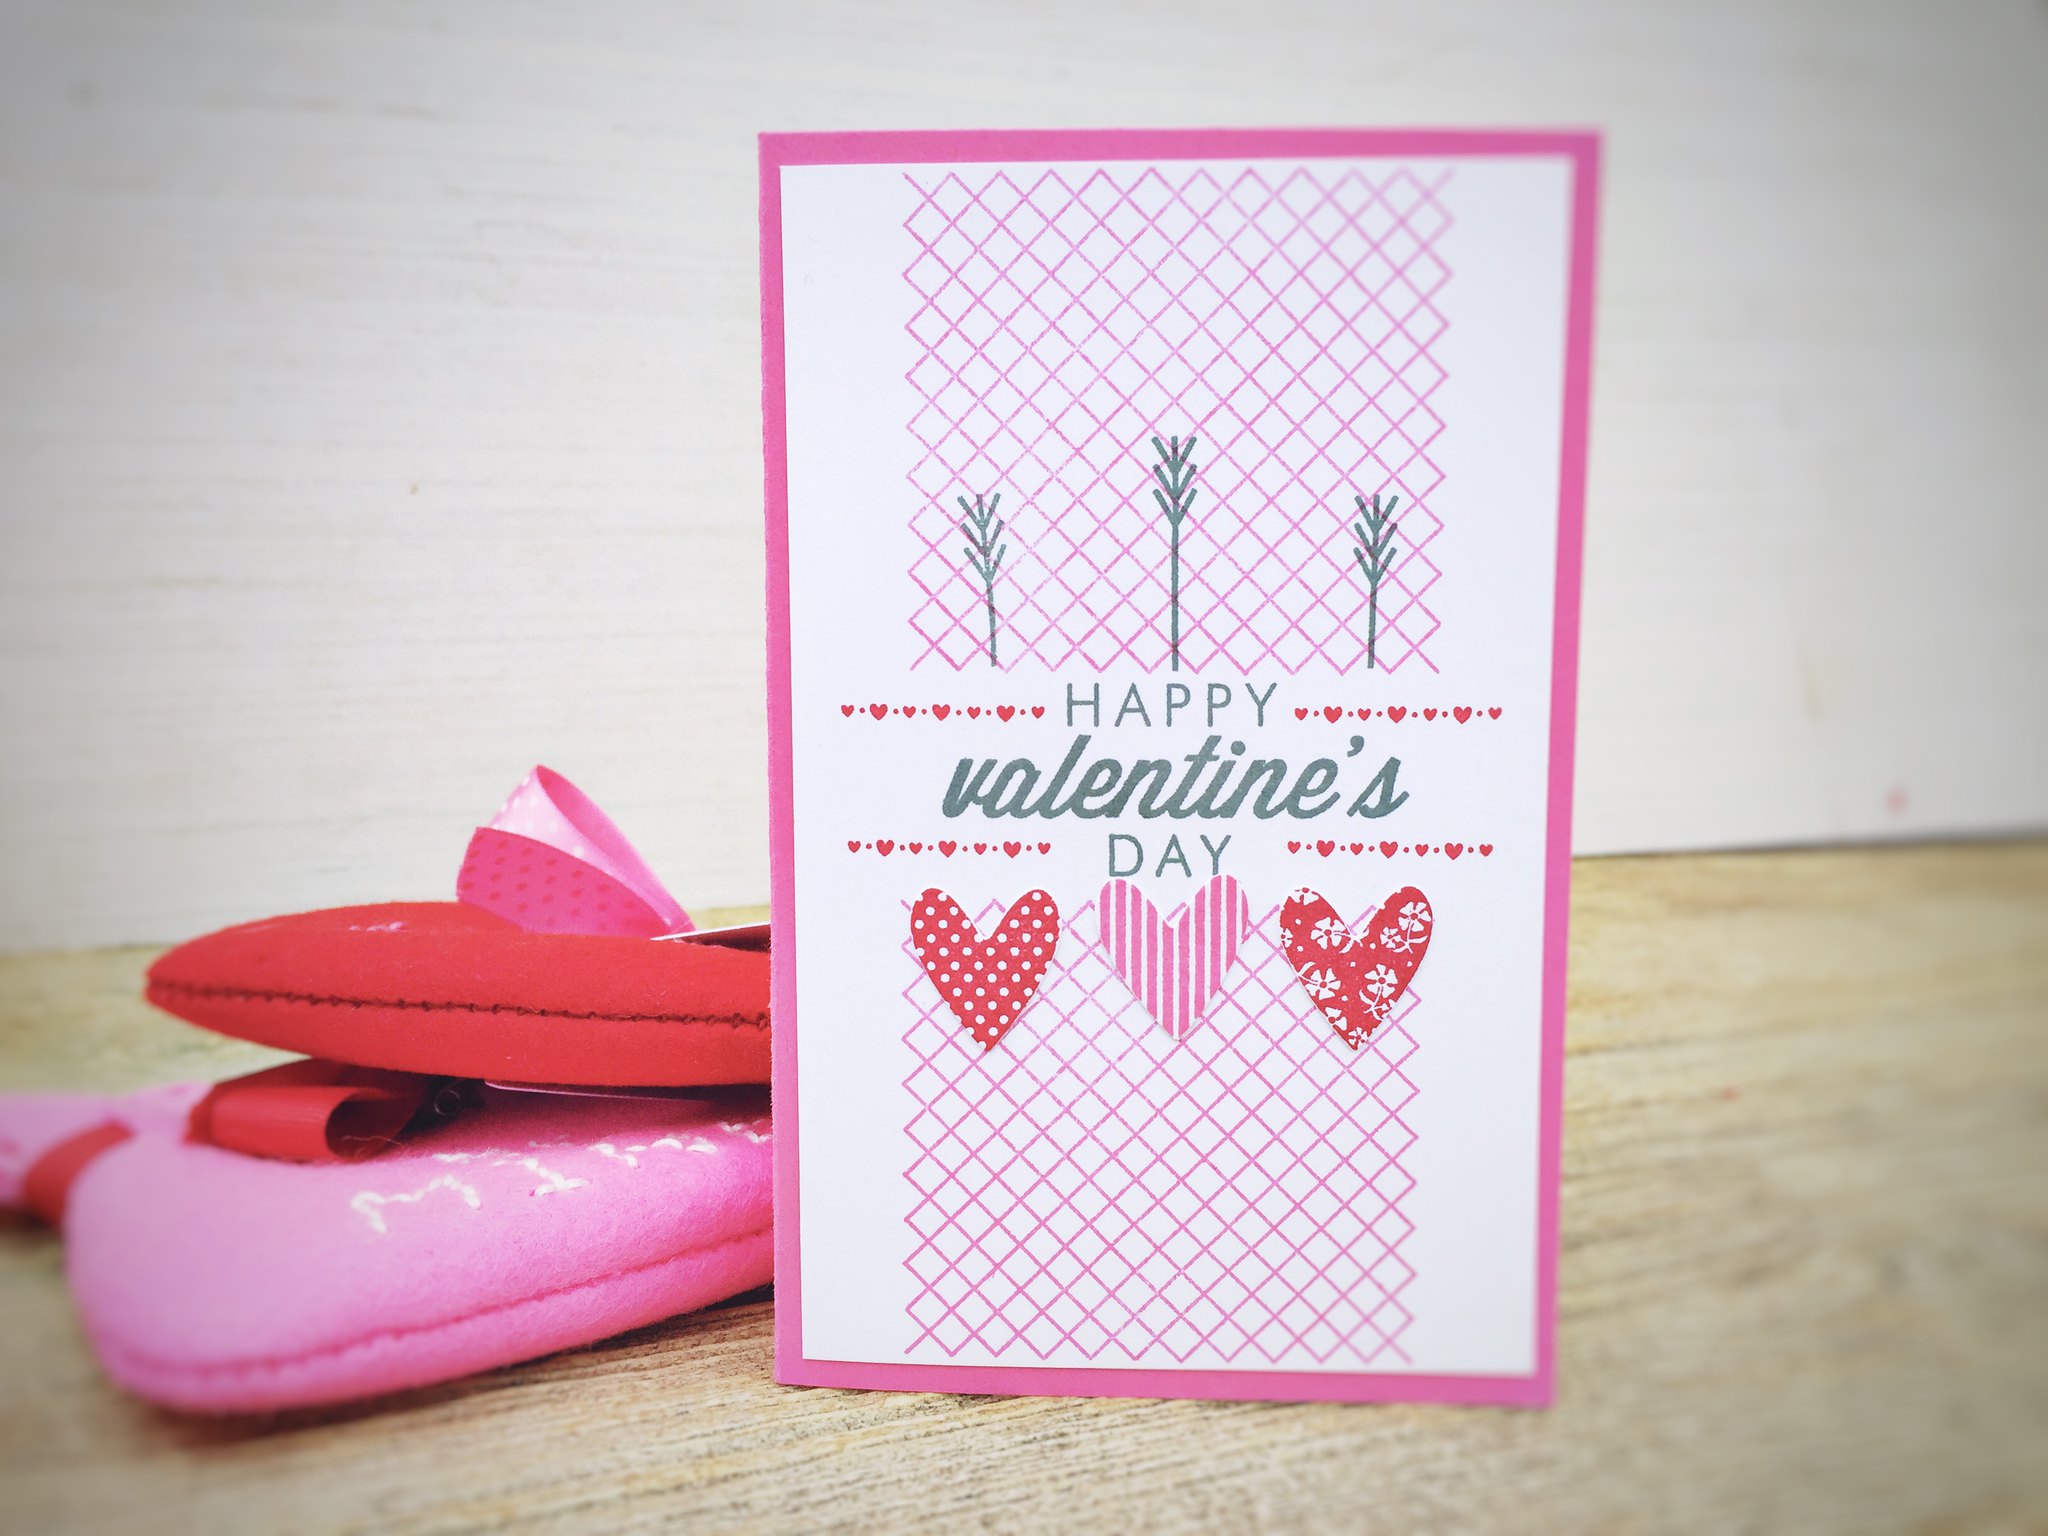
And while I was on a roll with it all, might as well make this little packages all ready to go here in a few weeks. I made this card using the Cross Stitched, Happy Hearts, Monthly Moments: February, and Monthly Moments: October stamp sets. It is sized to 3.5"x 5" to fit both the bag and to allow the logo on the fancy chocolate bar to show above.
Click here to see how easy the drawstring bag/sack is to assemble.
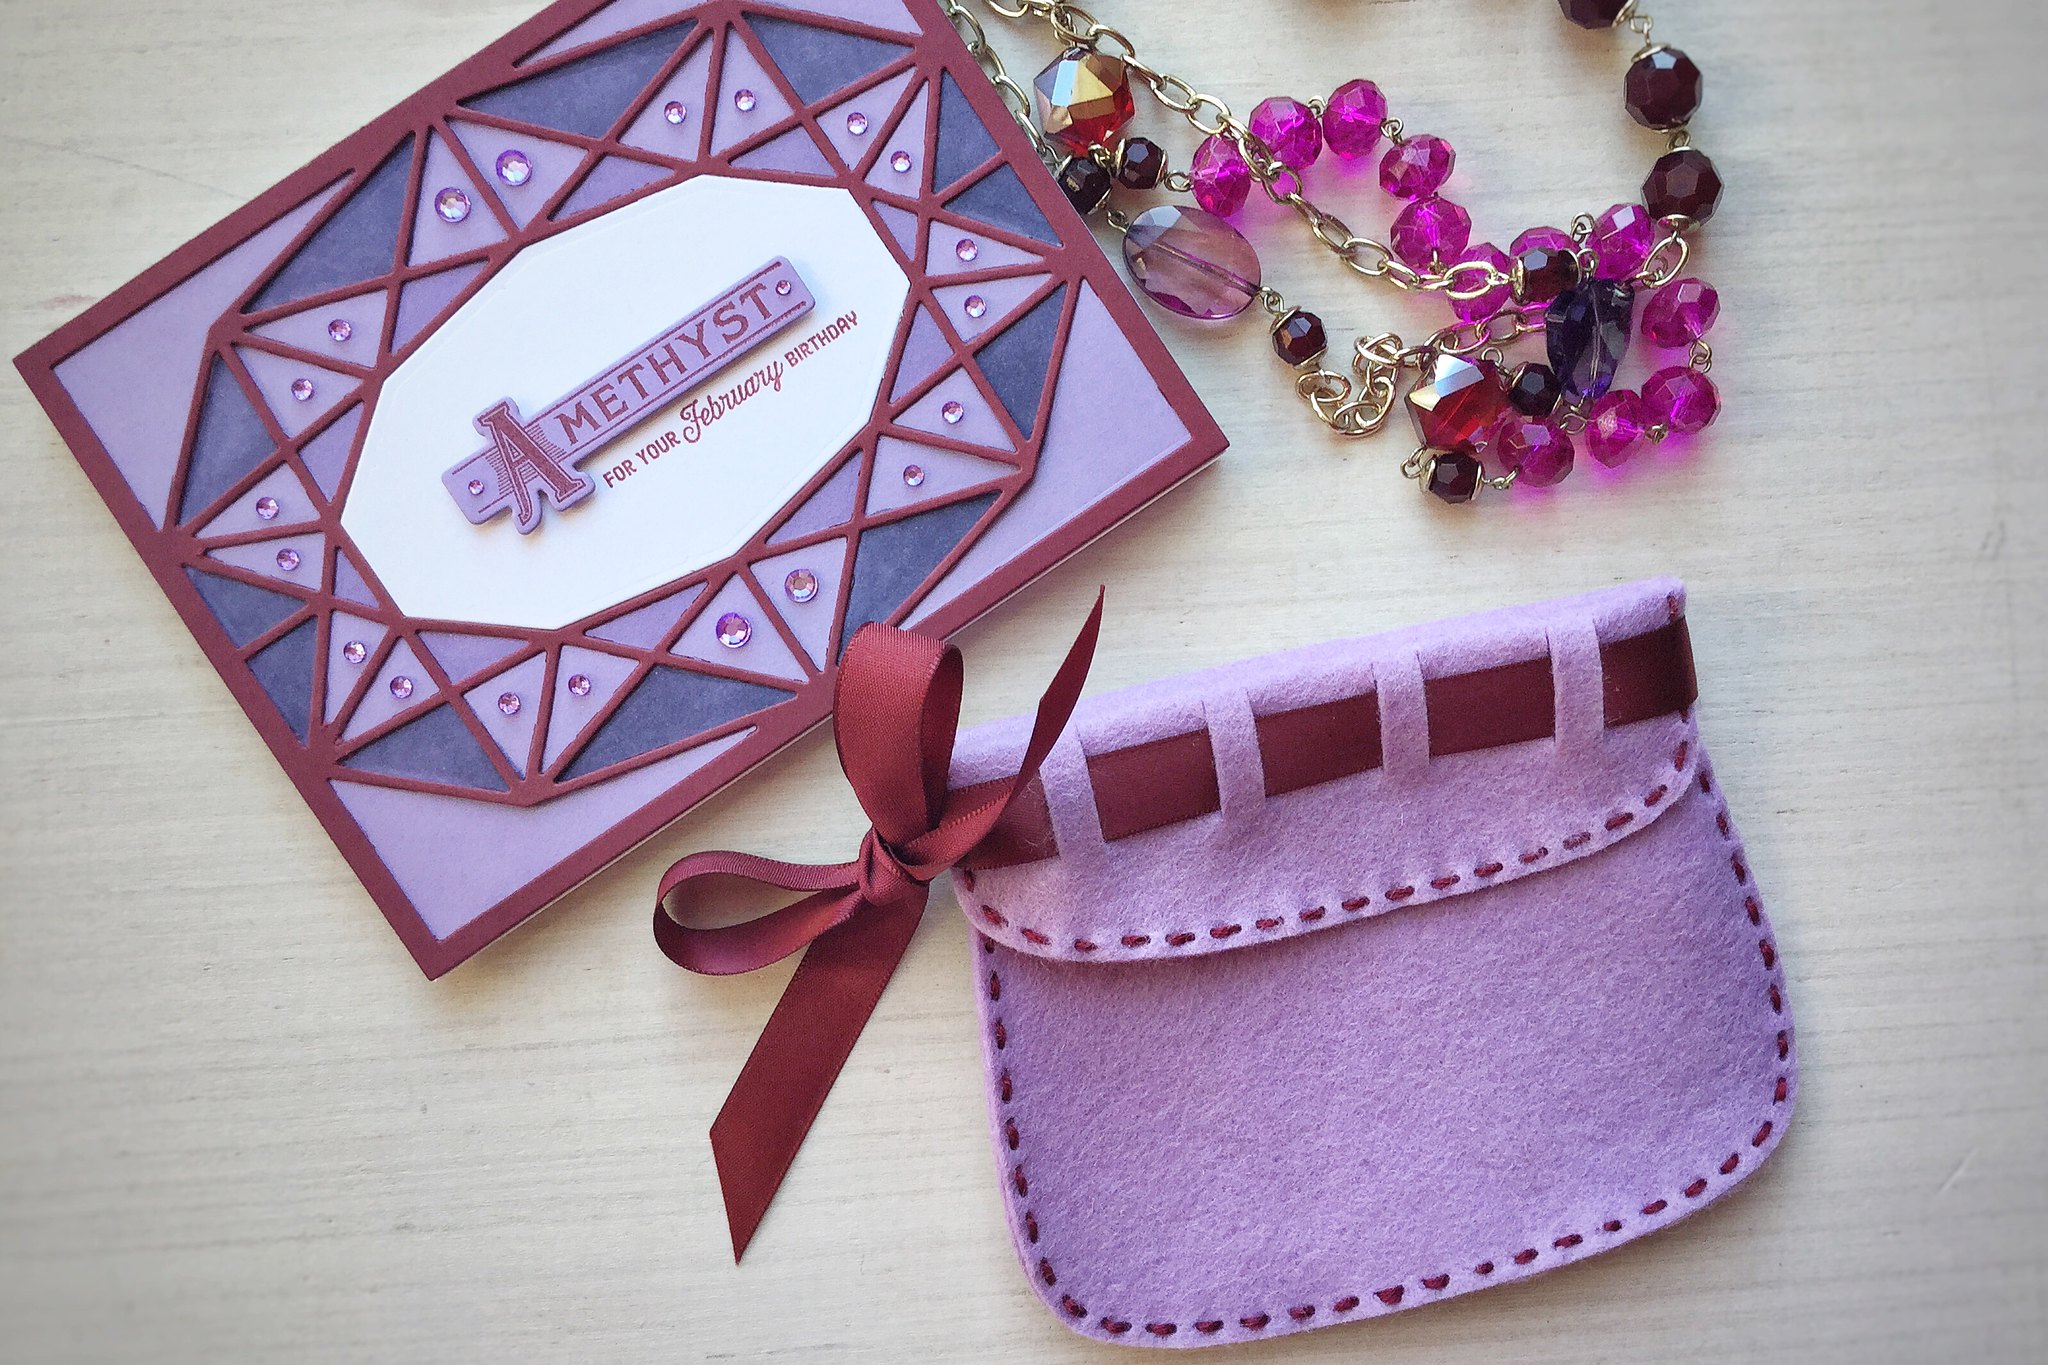
I used two of the large die (the one that is used to create the back of the coin purse with the fold down flap) and the included ribbon slot die. I folded over the top and woven ribbon through to tie on the side. Two large sized Basic Grey magnets are adhered on the backside of the flaps to keep this closed. It makes a lovely jewelry sack and the magnets will snag and hold your jewelry piece if for some reason it accidentally slips out.
This makes a great gift of a statement necklace for a birthday. Especially when teamed up with a birthstone birthday card created with last month's Charmed and Gem Stone Cover Plate.
A close up of the jewelry bag. This is a piece of cake to put together. So very easy and quick with the bias stitch. If you are thinking of dipping a toe into the stitching die waters, this is an excellent place to start. Great, effortless results!
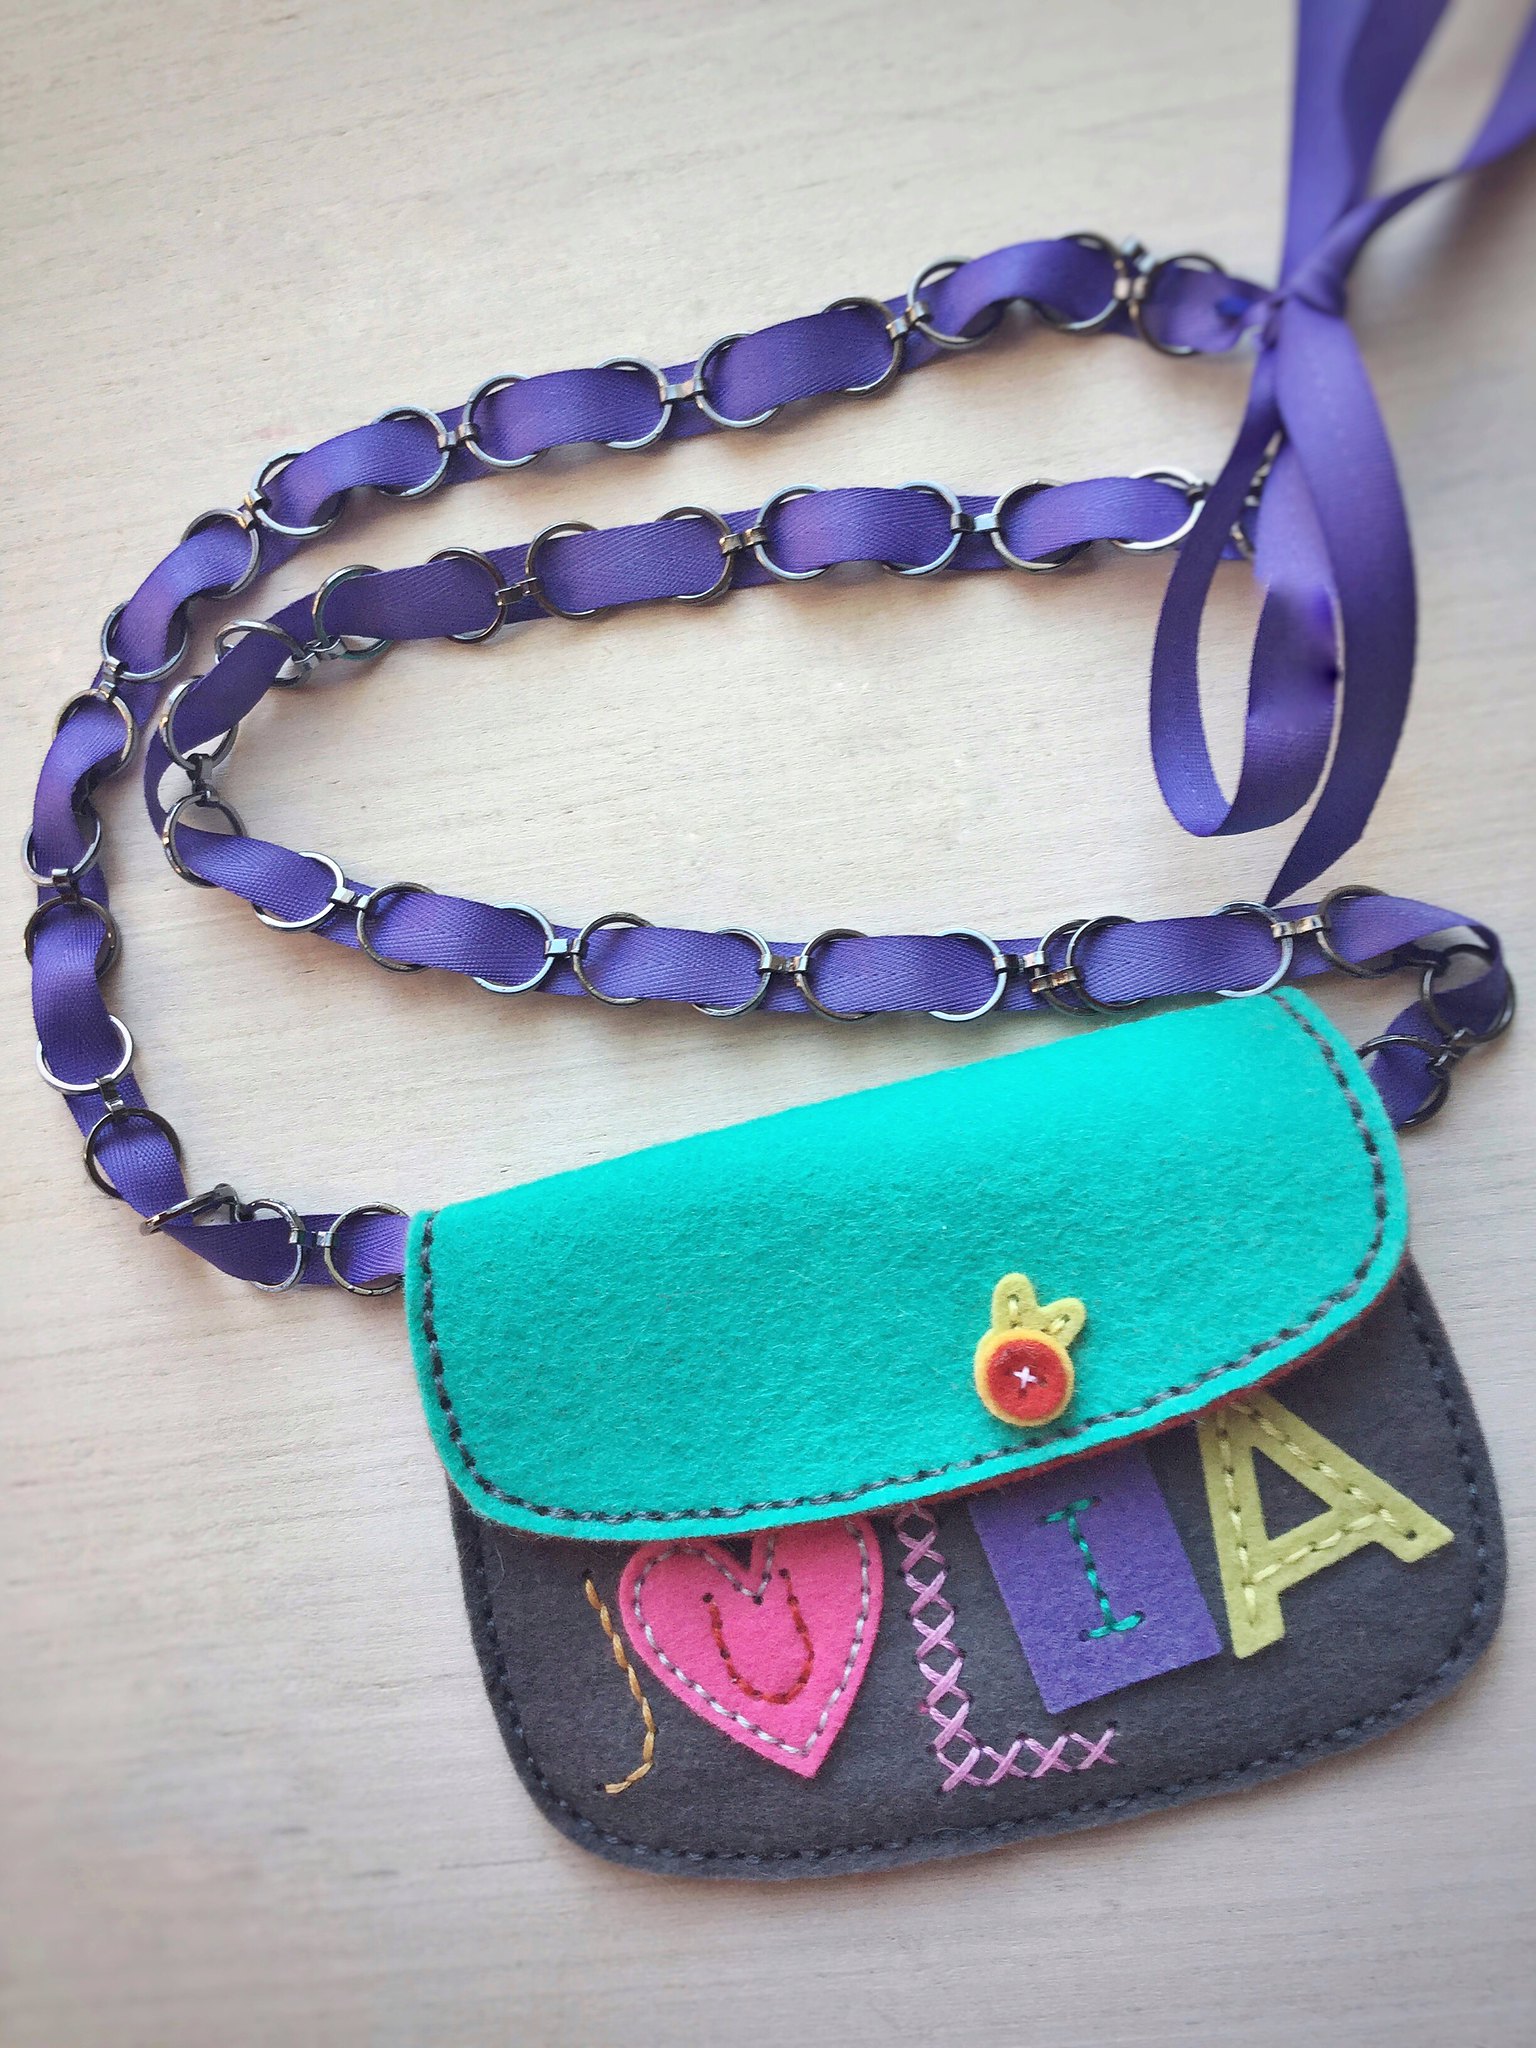
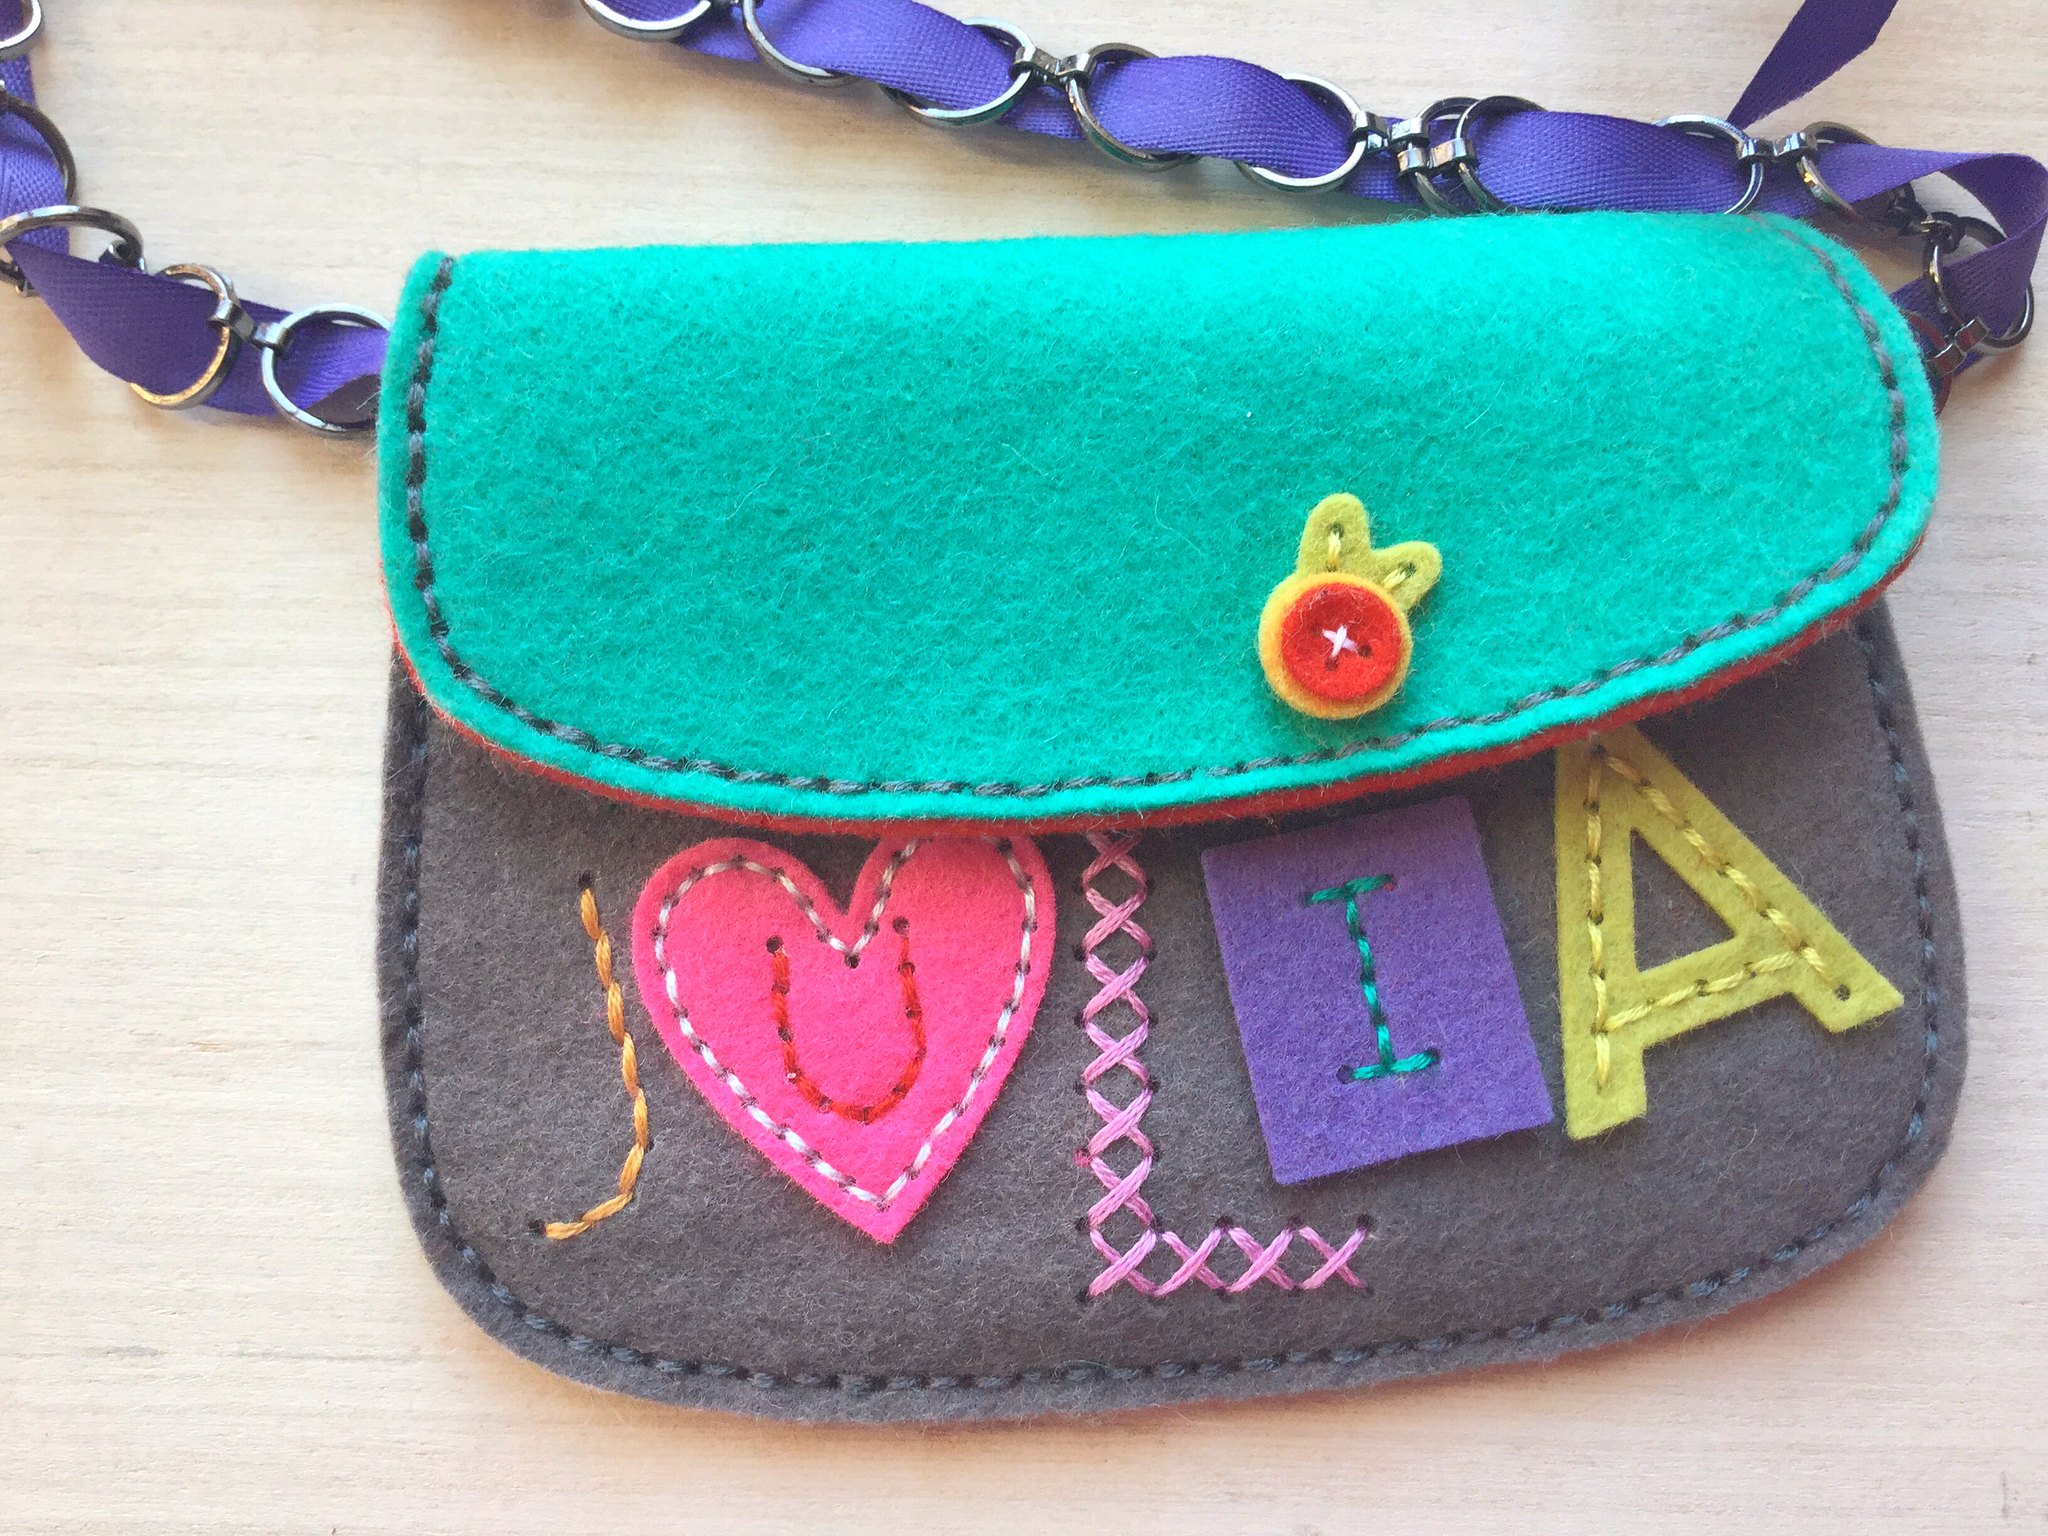
Next up, I have a little girl's personalized purse! I even have a clever way to put it on a chain.
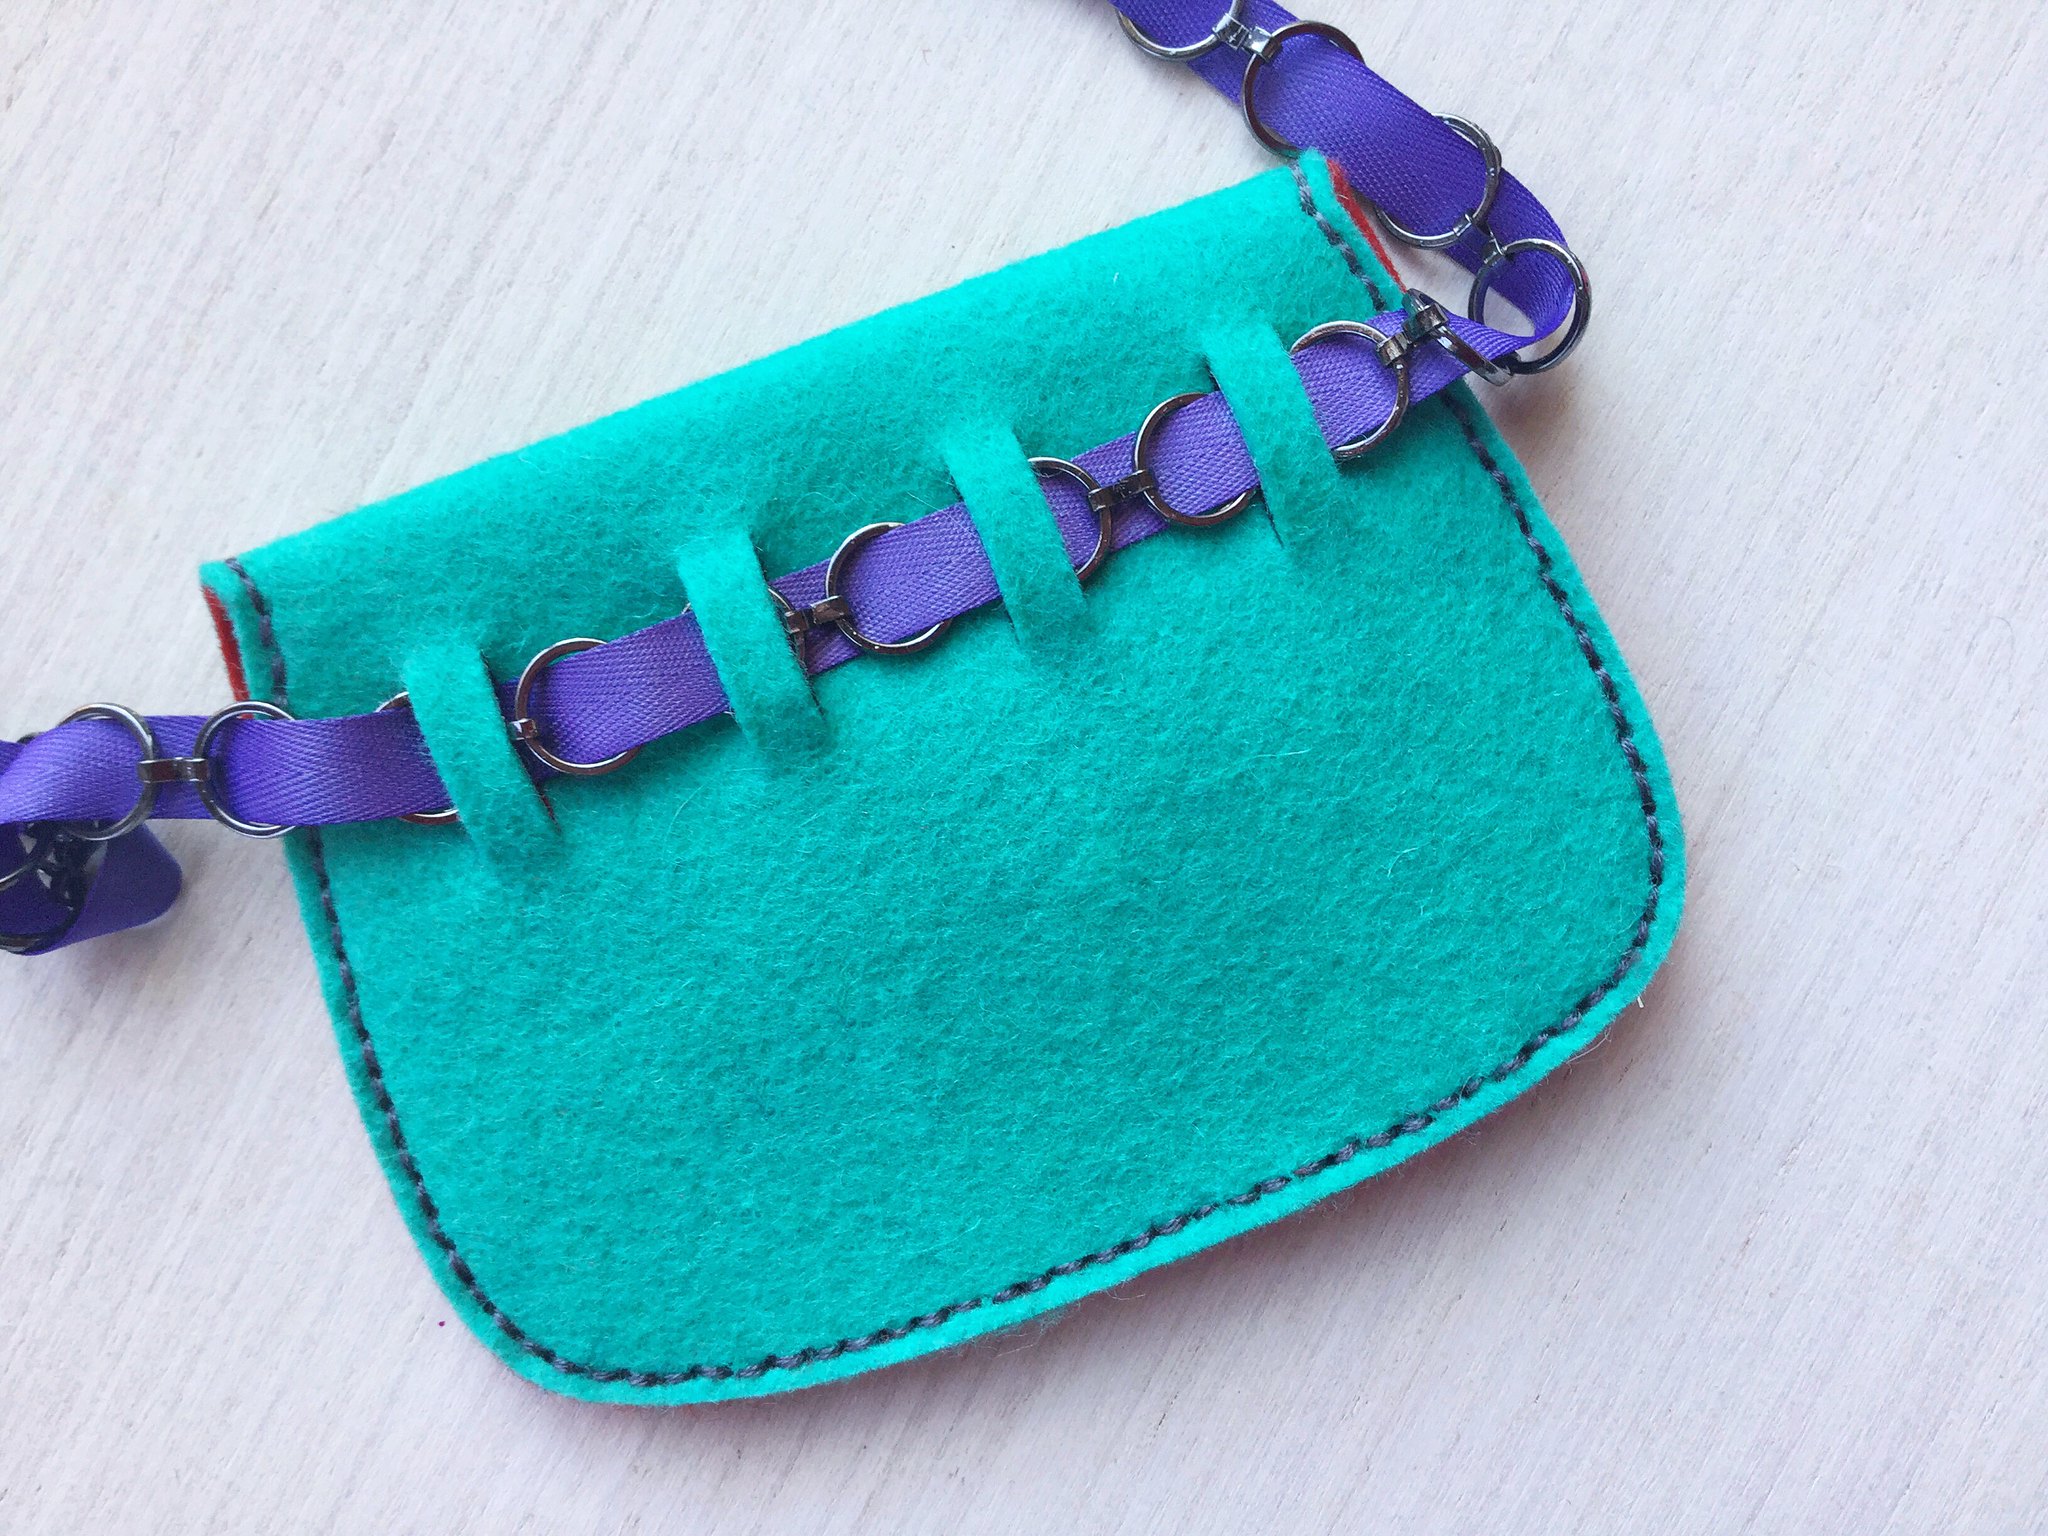
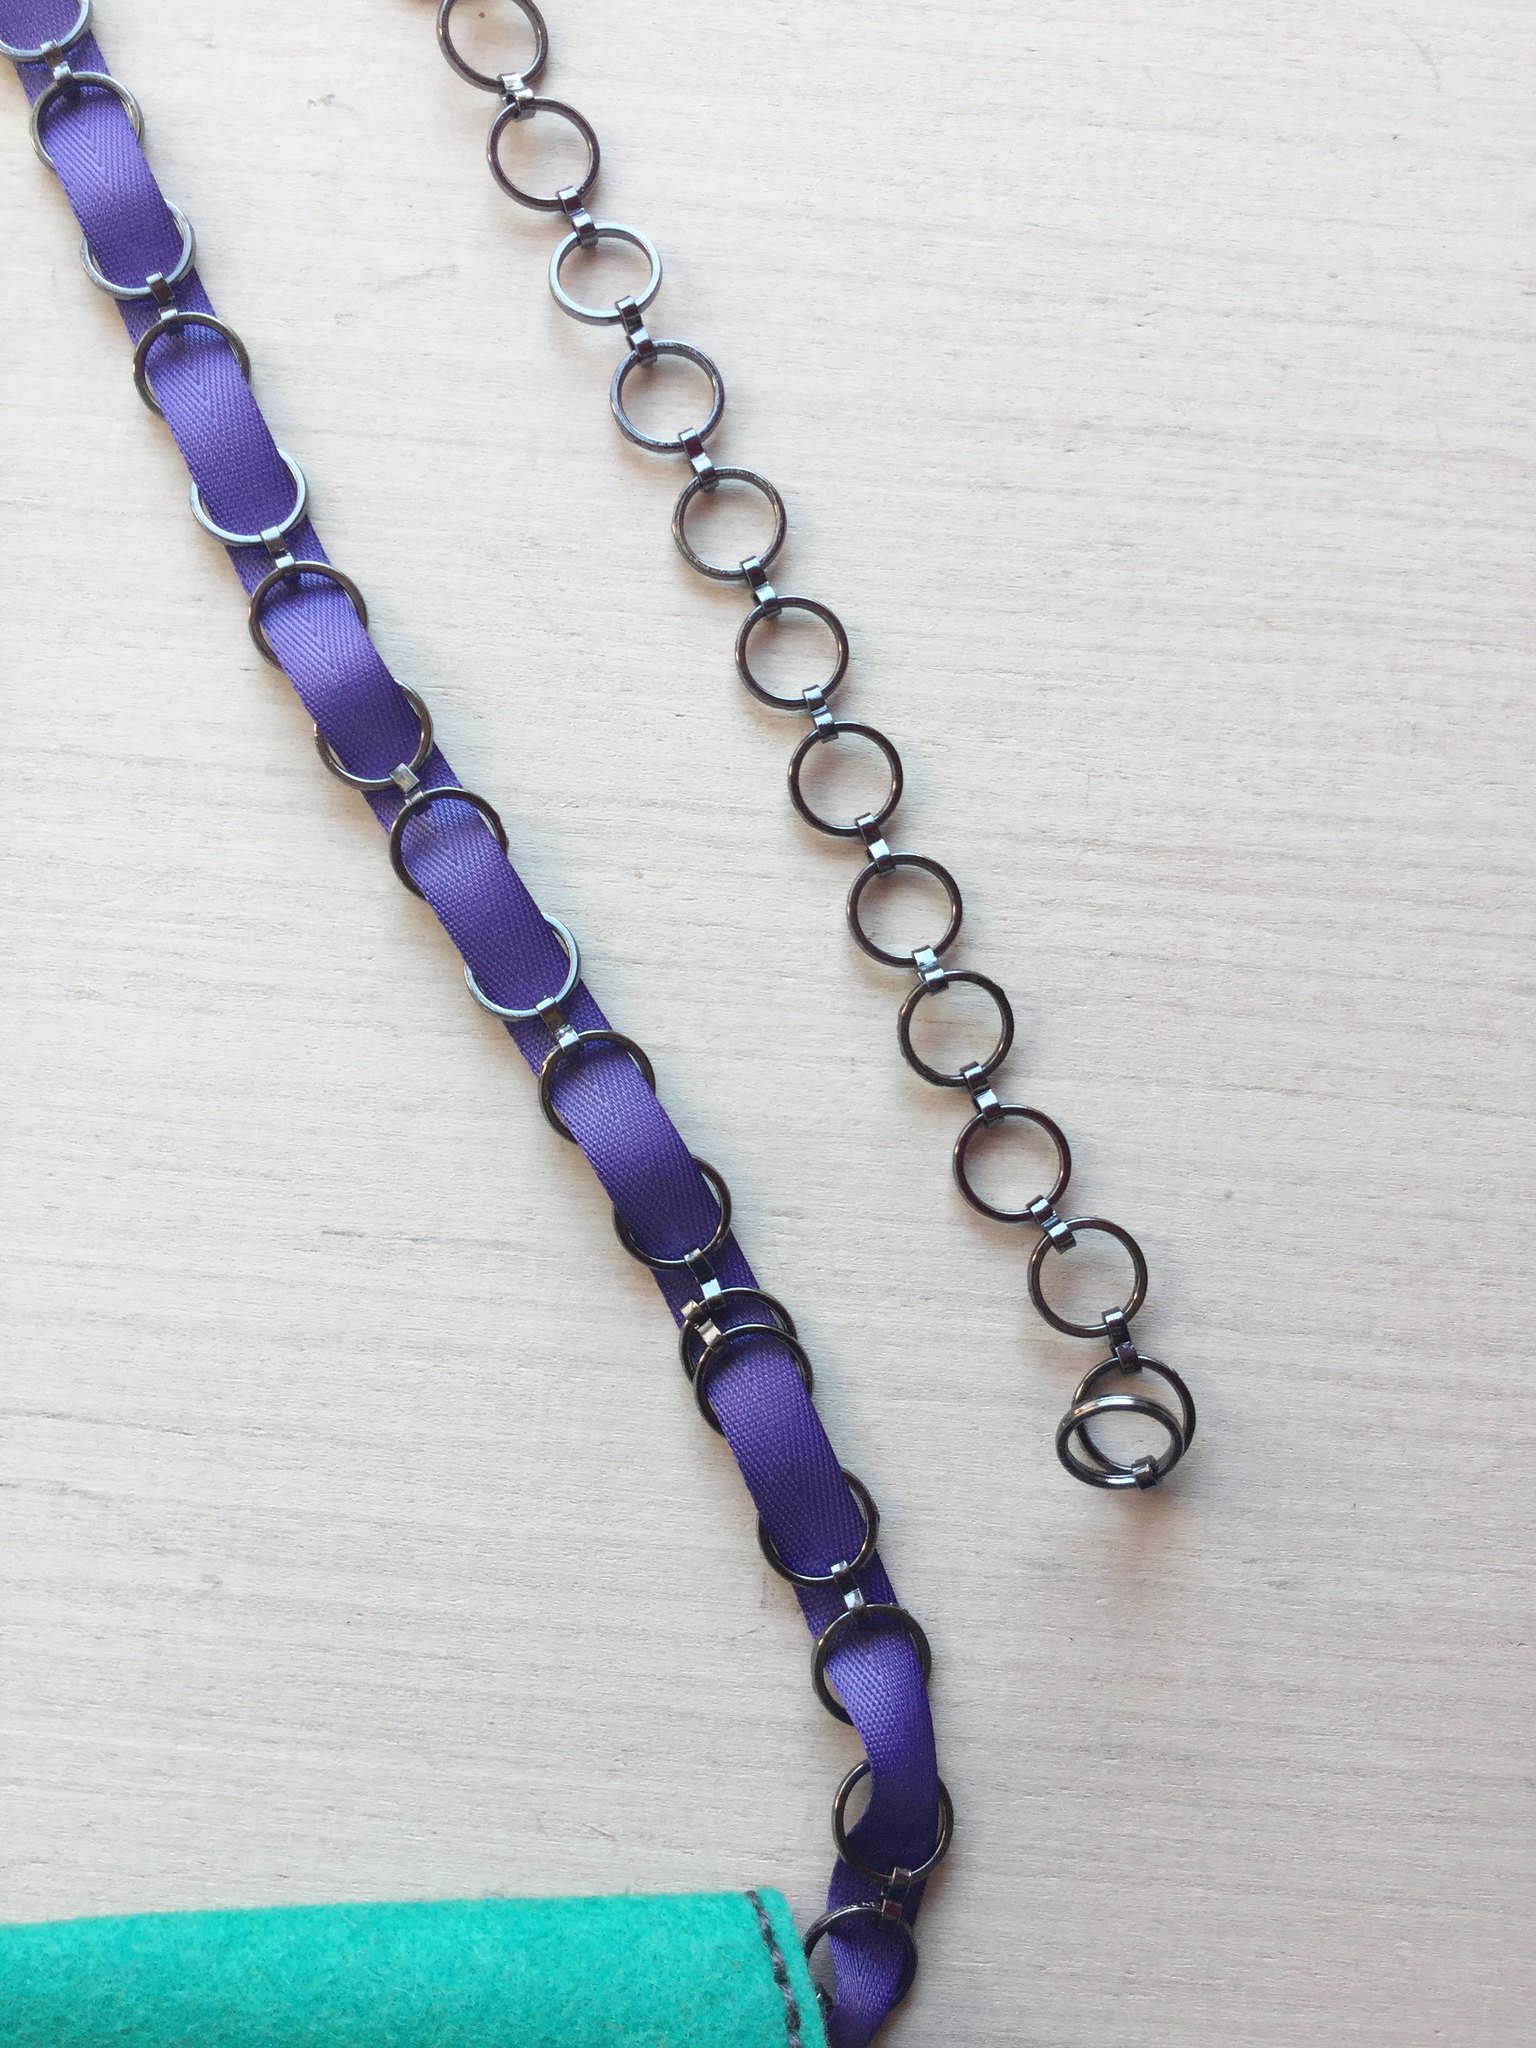
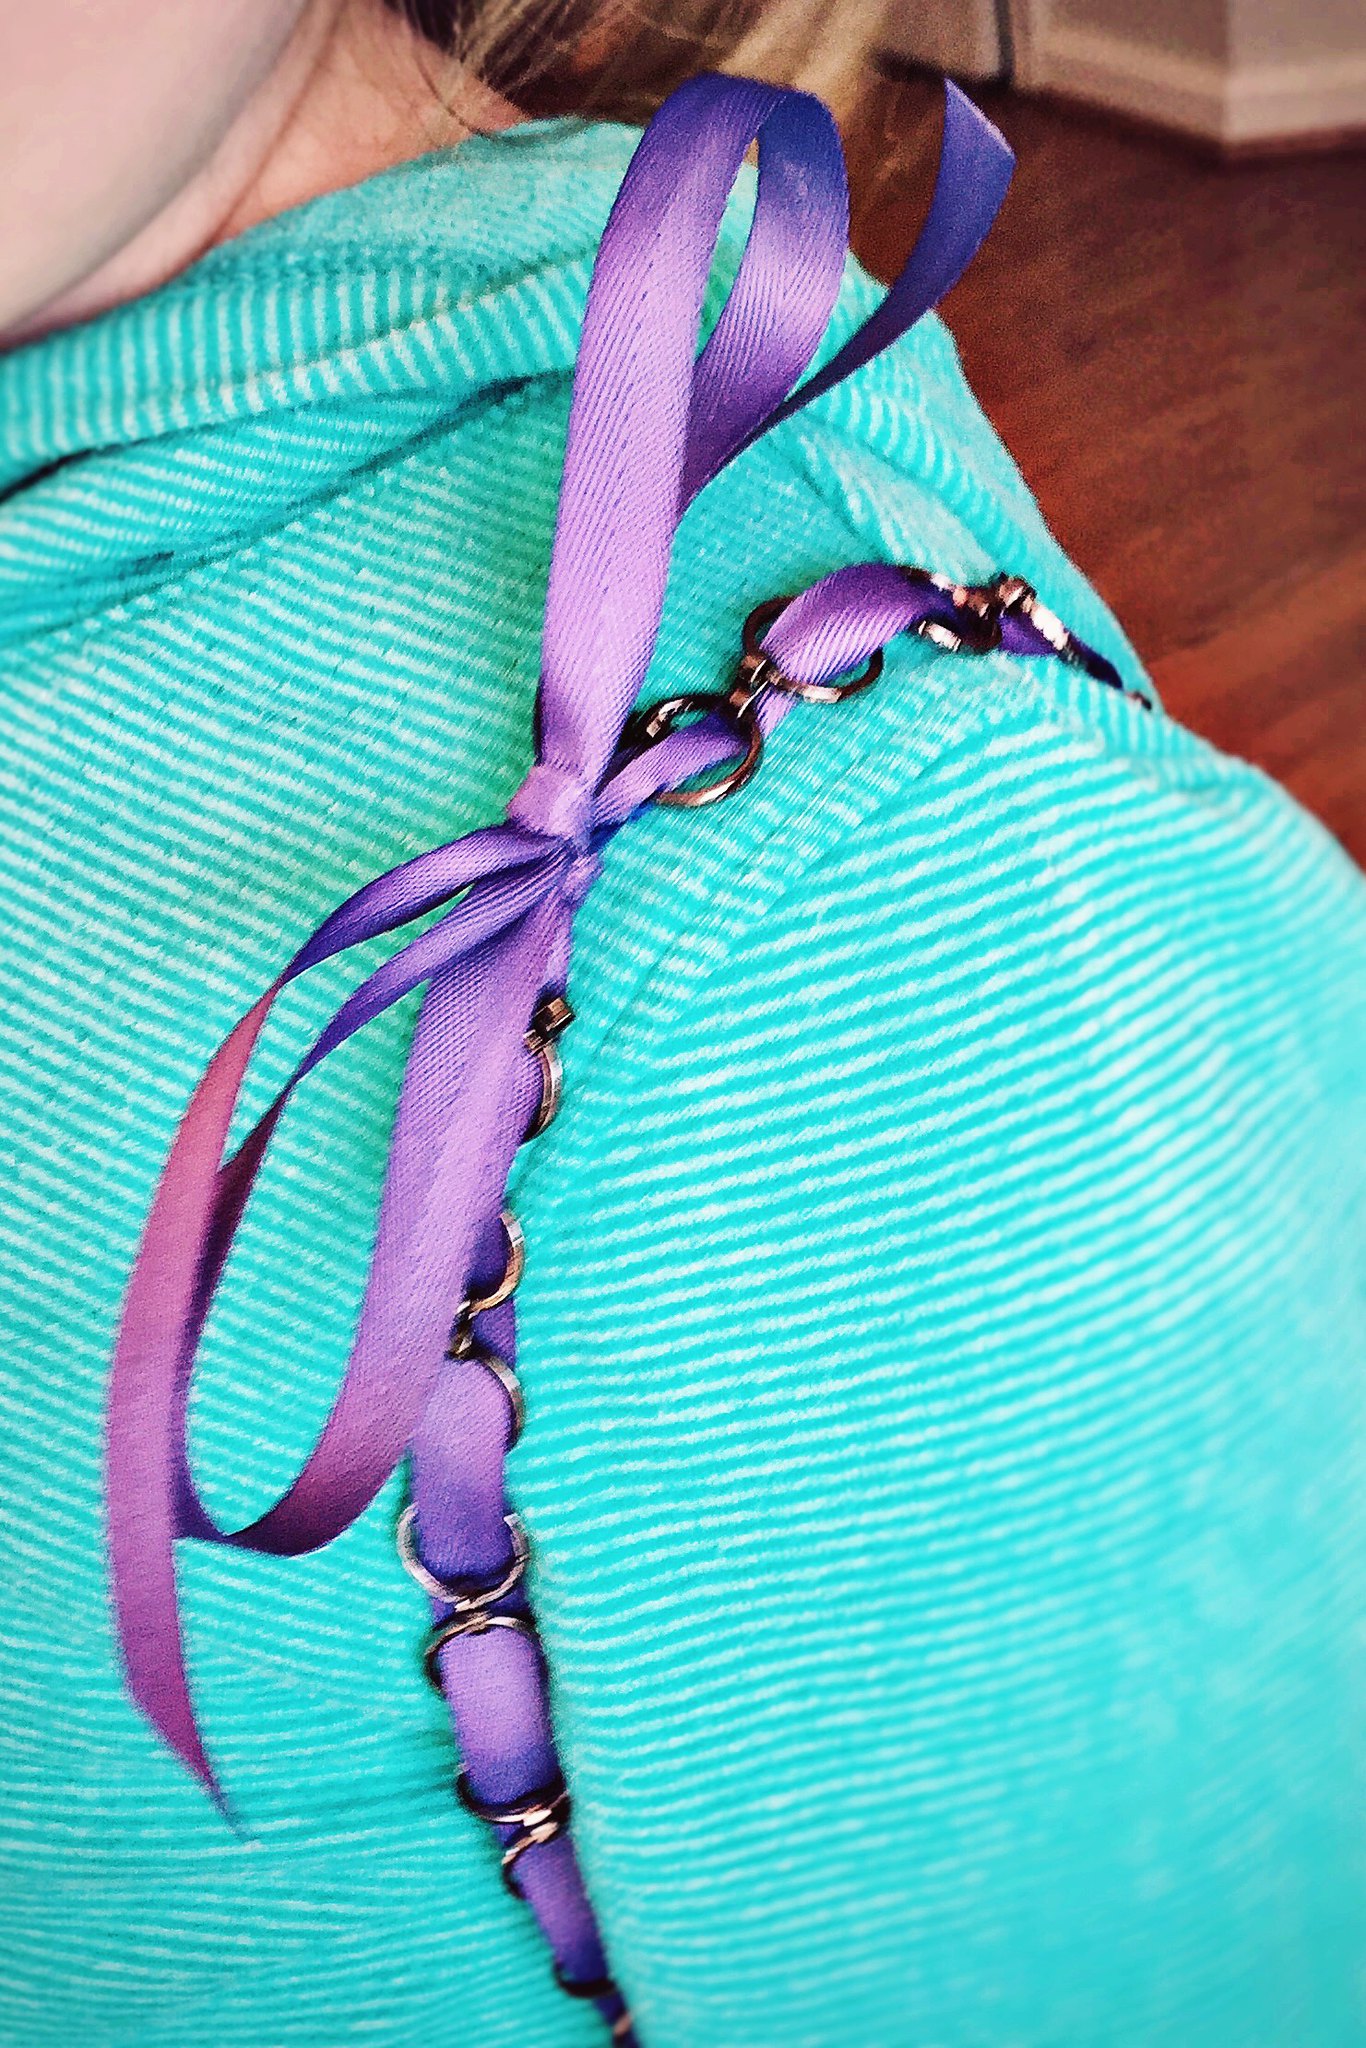
You can use the ribbon slot die to create a channel for your chain. To add strength and durability, the backside of the ribbon slot area is treated with Heat N' Bond. Fuse-able plastic is only a good thing here.
A loop in the chain is made when you tie the ends together at the top. A bow looks adorable on the shoulder of a little girl.
I used all sorts of stitching die goodies to personalize this purse for my niece. I was totally inspired by Punky Brewster and her mix and match style. You've got Sew Stylish I and II, Cross Stitch Alphabet, Coffee Cozy Details, Small Stitched Alphabet Die, Floral Cluster I Die, and Alpha Blocks. You can certainly simplify with whatever dies you have on hand.
I felt that there was a lot of info to rely with these variations and the very best way to rely that to you was in a chit chatty video. Click play to learn all the ends and outs.
That's it from me. Thanks for stopping by. This new stitching die collection will be available on 1/15/16 at 10 PM EST at www.papertreyink.com. More inspiration can be found at Nichole's blog. Looking forward to seeing everybody's designs today.
Supplies
Ladybug Coin Purse
Dies: Coin Purse II, Seasonal Stitches: Ladybug, Floral Cluster Die 1
Felt: Simply Chartreuse, Spring Moss, Aqua Mist, Ocean Tides, Sweet Blush, Vintage Cream
Ocean Tides Button
Pink Bow Coin Purse
Dies: Coin Purse II, Seasonal Stitches: Bow
Felt: Pure Poppy, Hibiscus Burst, Aqua Mist
Heat N' Bond
Cotton Fabric
Drawstring Valentine Day Bag Projects
Dies: Coin Purse II, Small Stitched Alphabet, Heart Cover Plate, Christmas Tree Change Up Card Dies
Felt: Hibiscus Burst, Pure Poppy
Ribbon: Hibiscus Burst Polka Dot, Pure Poppy Grosgrain
Stamps: Cross Stitch, Happy Hearts, Monthly Moments: October, Monthly Moments: February
Jewelry Gift Set
Dies: Coin Purse II, Gemstone Cover Plate, Charmed
Felt: Winter Wisteria
Ribbon: Scarlet Jewel Satin Ribbon
Cardstock: Winter Wisteria, Scarlet Jewel, Stamper's Select White
Ink: Scarlet Jewl
Copics
Gemstones
Large Basic Grey Magnets
Julia's Purse
Dies: Coin Purse II Dies, Cross Stitched Alphabet, Sew Stylish 1 and II Alphabet, Small Stitched Alphabet, Alpha Blocks, Floral Cluster 1 Die, Coffee Cozy Details
Felt: Tropical Teal, Smokey Shadow, Pure Poppy, Summer Sunrise, Hibiscus Burst, Royal Velvet
Topnotch Twill in Royal Purple
Large Basic Grey Magnets

ABsolutely darling projects!
ReplyDeleteBeautiful little purses. Love them. Can I ask you what the die cutting machine is that you have? I have never seen that.
ReplyDeleteIt's a Vagabond.
Deletethank you.
DeleteSo many completely different version! The die is cool and useful!
ReplyDeleteLOVE! It's so cute and so versatile!!! I'm thinking the ribbon slot die could be fun on cards and scrapbook layouts too?
ReplyDeleteQuick question about the polka dot back inside thing, is it a separate layer or fused on the back of the felt? (I haven't had a chance to watch the videos yet... I need to get ready to play Pickle Ball : D.
It's mostly fused to the felt backing with Heat N' Bond treated fabric. I had to leave a little pocket unfused ( or rather, unironed) where I put in the button loop.
DeleteThese are so sweet ! I think it will be the perfect thing for me to share with my 7 year old granddaughter, a nice way to maybe introduce her to the sewing machine !
ReplyDeleteSoooo cute! I love these.
ReplyDeleteSo glad you are a good design engineer! Just look at all the lovely projects made with your pattern! SOLD.
ReplyDeleteSo cute and so many possibilities - love all these stitched dies!
ReplyDeleteLOVE LOVE LOVE the new coin purse and great design. You have thought of every details! Great job! I can say this die set will be gone in minutes if not seconds!
ReplyDeleteAbsolutely adorable... can't wait to get my hands on these new dies!!
ReplyDeleteJust double checking, is the ribbon size you used 5/8 inch ?
Too cute for words! I have resisted these dies up until now, I can not hold out any longer!
ReplyDeleteHi Erin,
ReplyDeleteWell Girl.......You did it AGAIN!!! This die and all the designers versions are too CUTE !
I am in soooo much TROUBLE!!!!
Cariños,
María Alba
Oh my goodness, Erin - what a powerhouse of unique crafting talent you possess!! That is ALL!
ReplyDeleteOh my goodness, Erin - what a powerhouse of unique crafting talent you possess!! That is ALL!
ReplyDeleteHello,
ReplyDeleteHave yiur ever tried your stitching dies with the sizzix paper leather?
https://youtu.be/9dpiZqIMF1I
Thanks
Teresa
Super cute ideas Erin! I love this purse die already and so does my 11 yr old daughter! Thank you for your creativity!
ReplyDelete