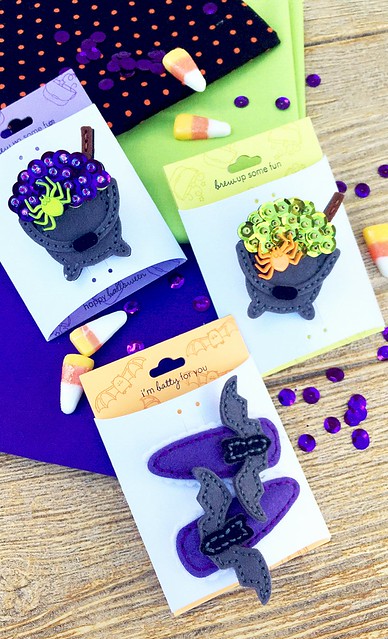
The Boutique Accessory Card is stamped with Tiny Treats: Halloween, both the appropriate image and sentiment in a tone-on-tone look. And I spy a new die there, all blinged out with sequins.
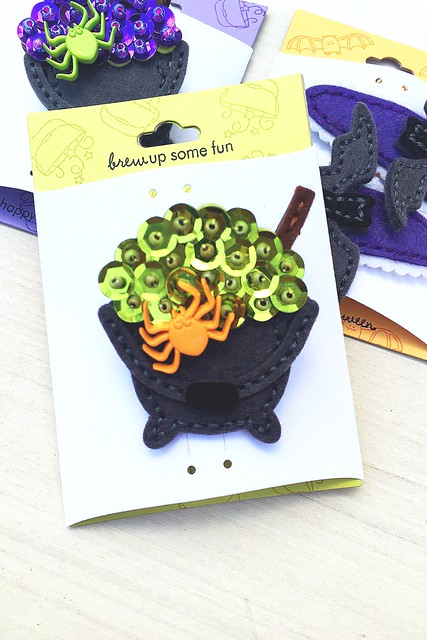
Check out this Stitched Beaded Cauldron broach that I'm gifting to my kids' teachers this fall! This die is designed to be used with 8 mm sequins and 8/O seed beads, which are my standard with any type of beading dies. (Originally used them on Beaded Holiday Stitch Kit.) The sequins are the "bubbling poison" in the cauldron. How fun is that? Nothing to be afraid of, the beading is fun and easy to do.
I added a spider embellishment that I picked up at Joann's. It was found in the button department and has a flat back. Perfect. I've seen little bat, skull, and bone buttons, too. You don't need any of these items to make the Stitched Beaded Cauldron look adorable, but it sure is fun to embellish..
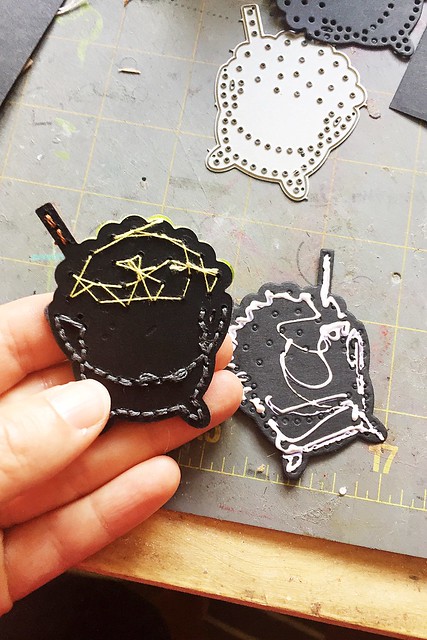
A couple notes on creating the broach. You'll want to hide all the messy stitching on the back of your project. Or at least, I did. I thought about it for a few days and came up with this solution.
You want to create a layer that doesn't have stitching holes. Tricky, I bet you're thinking.
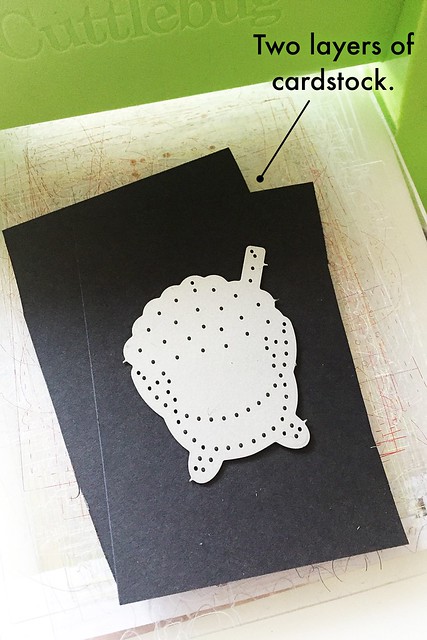
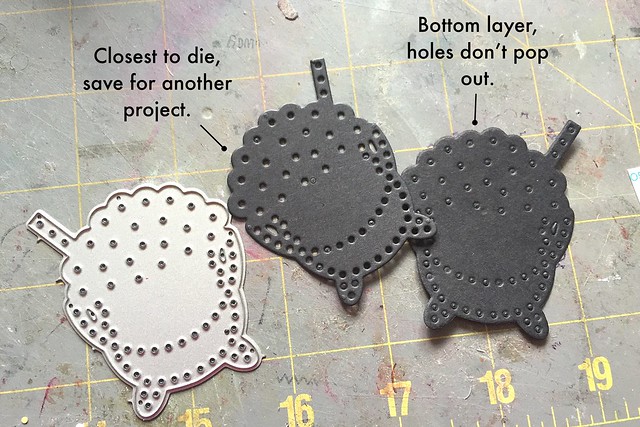
Not so much. Just layer two pieces of cardstock and cut the large base die in your die cutting machine.
You end up with two pieces, like this. The bottom most layer of cardstock will cut the shape, but the holes won't pop out.
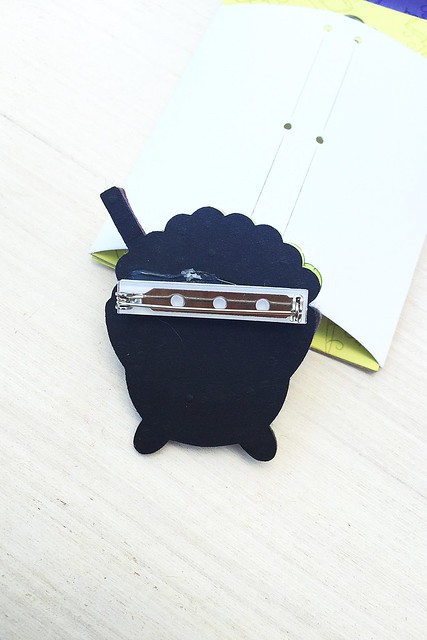
Glue this piece on the back of your project and hide all that messiness.
Then all you have to do is hot glue a pin back on to the back. All ready to go. Going to look so cute on a cardigan this fall. I'm going to make one for myself.
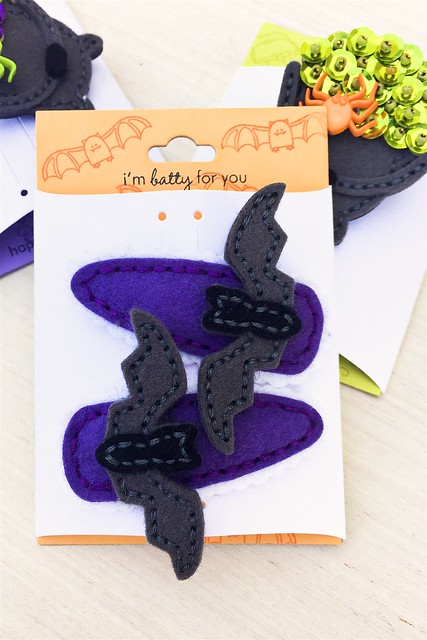
Next up, a few items for the little girls. The Stitched Bat has two layers. You can choose to add a "body" to the "wing span" for an additional detail. The "body" die also has a "holes-only" version, so you can sew these adorable bats to the Clever Barrette Cover. My Eliza already has her eye on these.
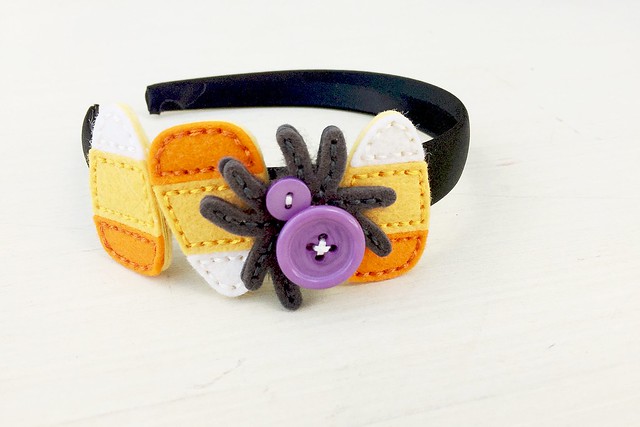
Next up, I have a Halloween headband. I stitched up. three Stitched Candy Corn and one Along Came a Spider (previously released) to embellish a black satin headband. Instead of adding the stitched felt layer to the body of the spider, I used Royal Velvet Buttons.
Another view of this adorableness. Eliza loves this one too. It looks great on her little blond head.
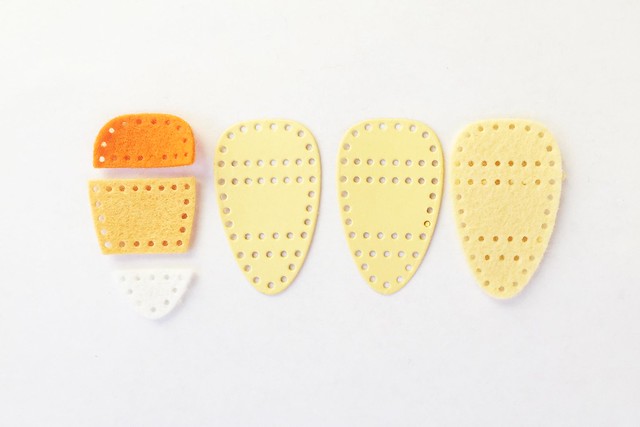
A visual for you so you can see how I assembled these pieces before hot gluing them to the headband. The top and bottom layers are felt, but sandwiched between them are two layers of cardstock. Gives it a nice sturdiness and heft.
That's it for me.My hubby has been out of town all week, so I'll be taking a little break for tomorrow. But watch out for Day 5, I'm saving some fun stuff for the last day. All these products can be found on August 15th at 10 PM EST at www.papertreyink.com. More inspiration can be found today at Nichole's blog. Thanks for stopping by.

Dear GOD! I love these!!!
ReplyDeleteI am so excited about these new dies! I am a huge fan, Erin. I even have a Pinterest board called Erin Lincoln is awesome. lol I have been stitching away ever since your first release of stitching dies. I cannot get enough! You are so talented! Love these!
Love the sequins in the bubbling cauldron!
ReplyDeleteI. Can't. Stand. It. These projects are absolutely TOO CUTE. Can't wait to do these with my girls. Thank you for all the inspiration.
ReplyDelete