
YAY! It's my favorite blog post of the year with Papertrey Ink! I LOVE (see the underlined, bold, capitalized, and italic text used to convey my enthusiasm?) making and giving felt Christmas ornaments. This the third year that I've been at it and although it is only September, I'm already anticipating adding these new pieces to my tree after Thanksgiving and seeing what they look like with the ones from holidays past. And I'm anticipating which combination and assortment I'll be making and giving. And maybe...just maybe...I'm contemplating a holiday crafting party were making these will be the main event.
The tradition of it just speaks to me and really makes my holiday. So, yes...just a little bit excited about the new additions I'm introducing today. And I certainly hope you like them too. A lot of thought went into this collection in order to bring you and yours as much joy as it does me. It has been nothing but a pleasure for me to design and create with.
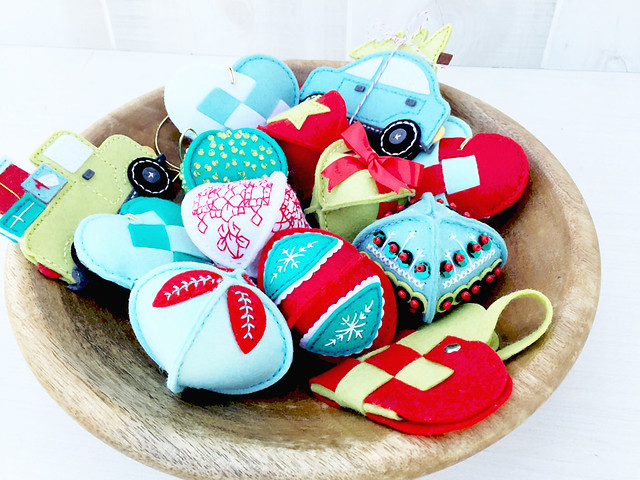
Just take a look at all this gorgeousness. With every ornament that got dropped in this bowl over the last five days, I'd show Matt. "Look at this!" He liked it. But mostly, I think he's just happy that I spend far less money on Hallmark ornaments when I make my own. LOL!
Let me talk about the Stitched Ornament Collection first. These are six different dies. And they are so affordable! Just wait until you see the prices. Each individual die you cut four times, embellish, sew up the sides, and then stuff with Poly-Fil before you close it up. You get a 2-3/4" ball like ornament for your tree.
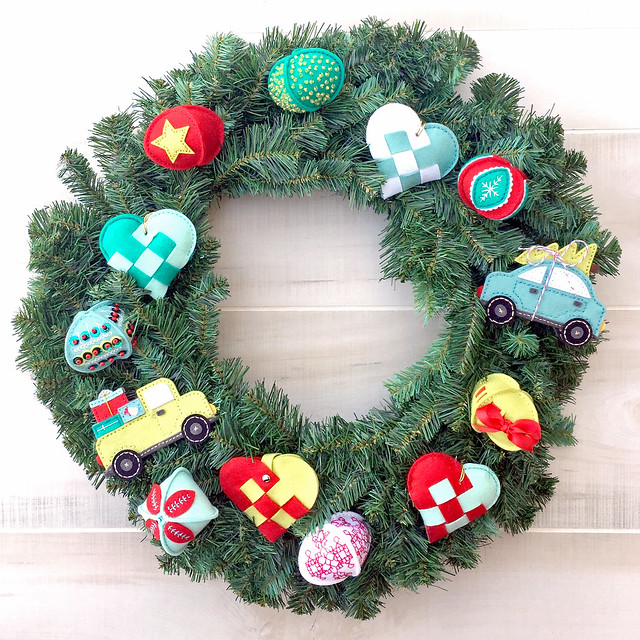
Using the above photo, let me identify them for you. Starting at 1 o'clock and working my way around and ending in the middle:
Stitched Ornaments: Sequins dies
Stitched Ornaments: Classics dies (used with Coffee Cozy Detail Dies)
Stitched Ornaments: Woven dies
Stitched Ornaments: Beaded dies
Stitched Ornaments: Topped dies
Stitched Ornaments: Topped dies
Stitched Ornaments: Classics dies
Stitched Ornaments: Embroidered dies
Stitched Ornaments: Embroidered dies
If you notice, in that list, I mentioned Stitched Ornaments Classic twice. It has multiple versions. This is the one that makes the plain "ball" that can be embellished with other stitching dies (Coffee Cozy Details, Pajama Patch Dies, Floral Cluster 1) and it also comes with additional dies to create the snowflake diamond on each side.

And not only are the dies affordable, but like yesterday with the Woven Heart Die Collection, I've sized these to minimize felt waste and maximize ornament yield specifically to the PTI rolls of felt. On the basic ornaments (Embroidered, Beaded, Woven, Classic) you can get six ornaments per roll. That's $1.00 a piece. If you create one that needs additional details (Classics with snowflake center, Topped, Sequins), it's five ornaments per roll. Which works out to be $1.20 a piece. Isnt' that fantastic?
So...the dies are inexpensive and the supplies per ornament costs are low. These two features together are going to make holiday crafting so easy and fun.
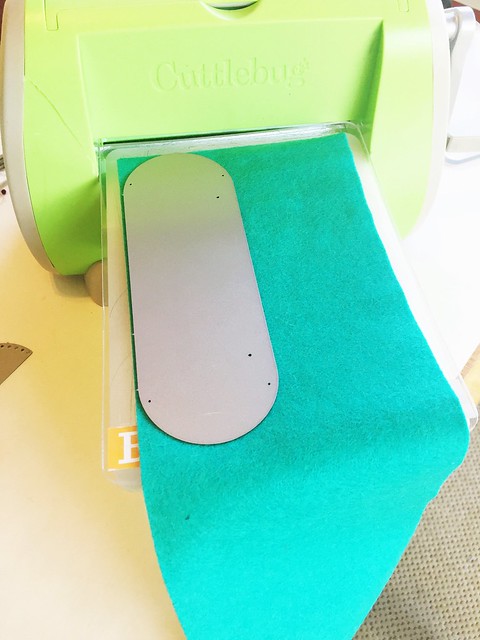
I want to show you this photo to show you how to get these yields. Instead of cutting my felt down with every cut I make, I'm just threading the roll through my die cut machine. I can really place my cuts right up next to each other this way . With the Woven Heart Die specifically, this is critical. It is going to be really tight to get four Woven Hearts out of a roll (man, you will have nothing left over), but entirely possible if you cut on your intact roll.
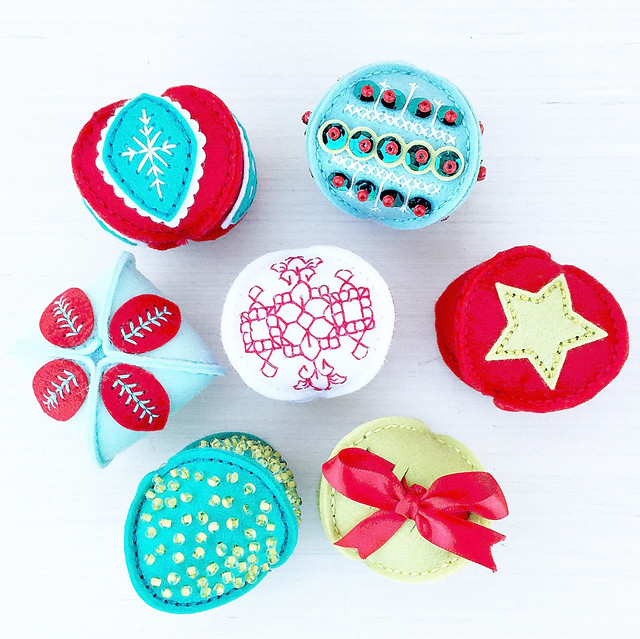
Let's talk specifics. There are six different dies, after all. All the variety together is a really pleasing picture.
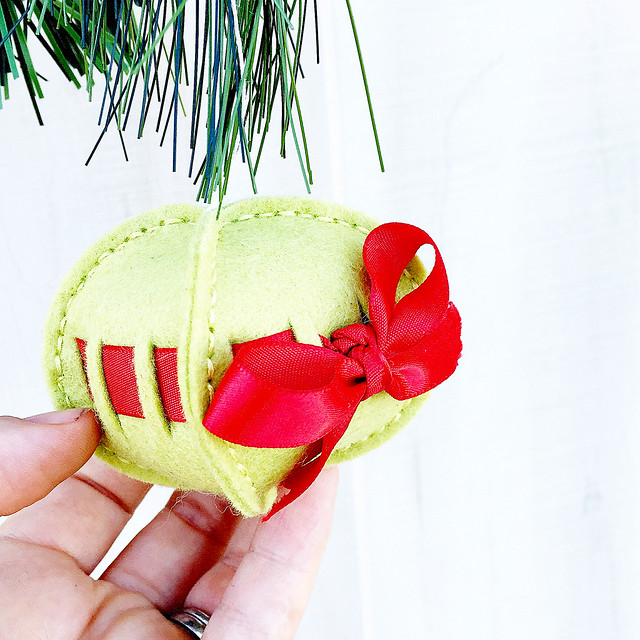
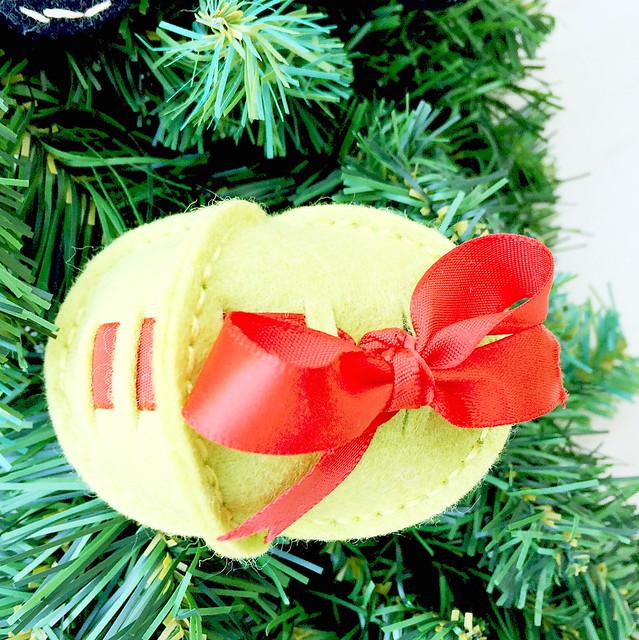
This is Stitched Ornaments: Woven. It works with the Satin, Swiss Dot, and Grosgrain ribbon that we carry in the store. Just weave the ribbon around and tie in a nice bow. I do want to point out that on the corners the ribbon is underneath the felt.
I want to mention how quick the simple designs are to stitch up. With Woven, Topped, and Classic, you can breeze right through these. I can make three Woven in an hour. For mass production, that's pretty speedy.
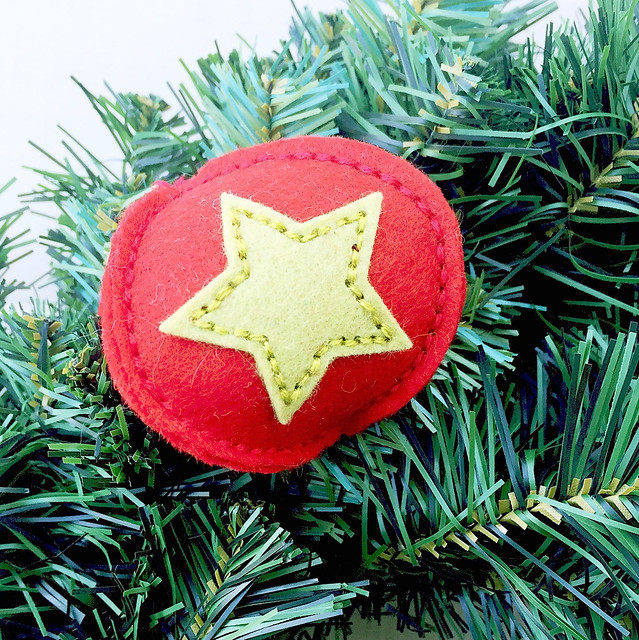
Here's another quick one. This is one version of Stitched Ornaments: Classics with a star from the Coffee Cozy Detail Dies on top. Again, maybe not even 30 minutes. Quick, quick.

And this is another version of Stitched Ornament: Classics. The diamond and snowflake dies comes in the collection. This takes a little longer, but not too much more.
Another one of the quickies, is the Stitched Ornament: Topped. You can see it in my first few photos. It has the four Pure Poppy leaves on the top. I neglected to get a solo shot of this die, but you get a really good idea. And I know that Kay has a fantastic example on her blog with this die.
With six different dies, there is a lot of variation. It's nice to have some quick and easy ones and contrast those on your tree or gift giving with one or two of the more embellished versions. They may take a little extra time, but it is SO VERY WORTH IT. This is Stitched Ornament: Sequin.
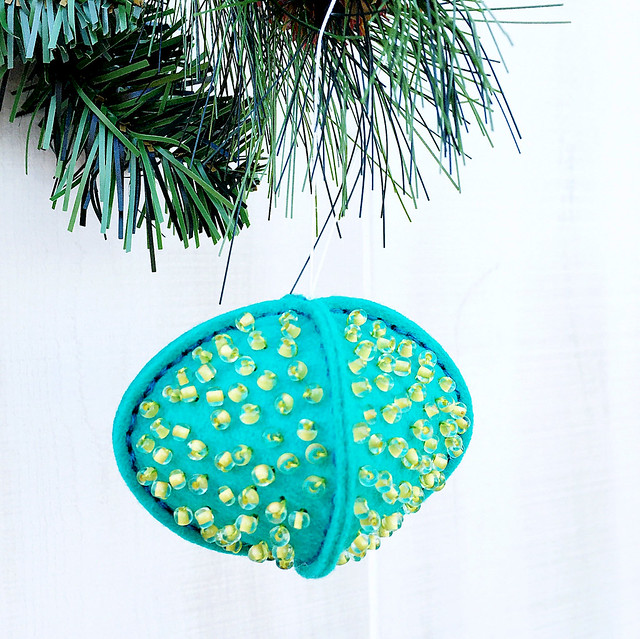
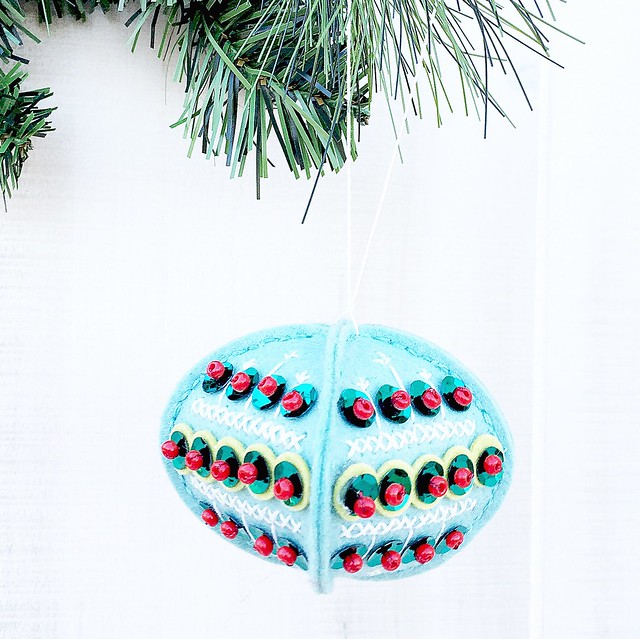
This is Stitched Ornament: Beaded. It will really sparkle on the tree with the reflection of the Christmas lights. I do have a note here. I used almost a full vial of glass beads on this, which I got on sale for $1.50, driving up the cost per ornament. $2.50 really isn't that bad really...unless you make a lot of these. So my advice and what I'll be doing myself, is to buy the big bags of bulk beads. Especially this time of year, you can find some nice holiday assortments that will go on sale from time to time. I bet you can get the cost per ornament down to around $1.50. Much more doable. I need to make one of these with different types of beads on it...I bet that would look fantastic.
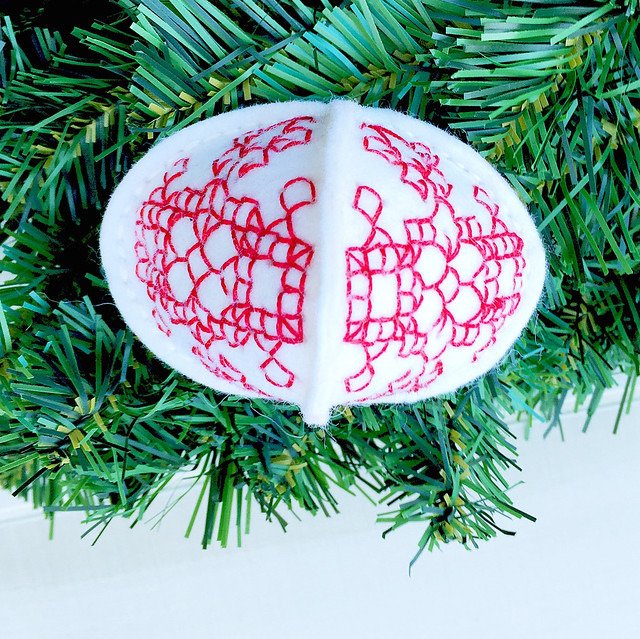
And this is Stitched Ornament: Embroidered. It is based on some black work I saw. My plan here is to cut a bunch of these out and leave a tray on my kitchen island, working on them throughout the coming months. I'll assemble when I have a nice pile of finished sides that was created with little moments of time I'd otherwise have lost or got sucked into surfing on my iPad. (I'm so guilty of that!)
I have some visuals for you to help you make your own.

And I like to have a really big stitching diagram for embroidered items. Less eye strain. Print this full size.

There are many ways to stitch up Stitched Ornaments: Embroidered. My way is just one. So here's a blank visual of it so you can print and design your own on paper before you put thread to felt.

So there you have the Stitched Ornament Collection. It's pretty nifty. Mix and match for a beautiful assortment. Go heavy on the easy ones, throw in a smaller percentage of the fancy ones, and you'll have a beautiful tree or gift.
Here are some basic instructions on how to assemble these ball shaped ornaments.


Here are some basic instructions on how to assemble these ball shaped ornaments.


OK. Moving on...because that's not all folks! Not by a long shot. There's more.
Remember the Stitched Car and Truck dies from June? Here's the original blog post that includes the assembly video. I have addition dies to make them festive for the holiday season

The Stitched Car gets a tree on top with the Stitched Car Tree Dies.

A diagram for you.
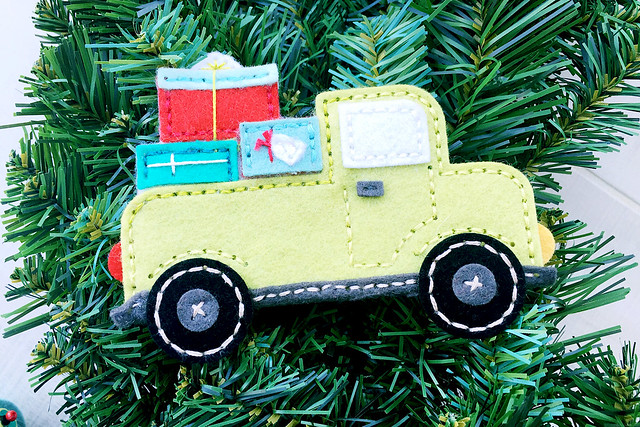
And the Stitched Truck gets a bed full of presents with the Stitched Truck Presents Die.

Both new additions work by being sewn between the back and front felt layers of the vehicle as indicated by the visuals. Also noting that for my ornaments, there is a cardstock core between the large felt pieces to give these a little rigidity.
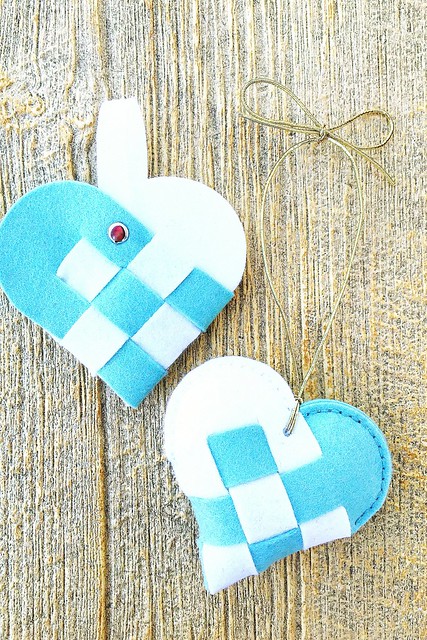
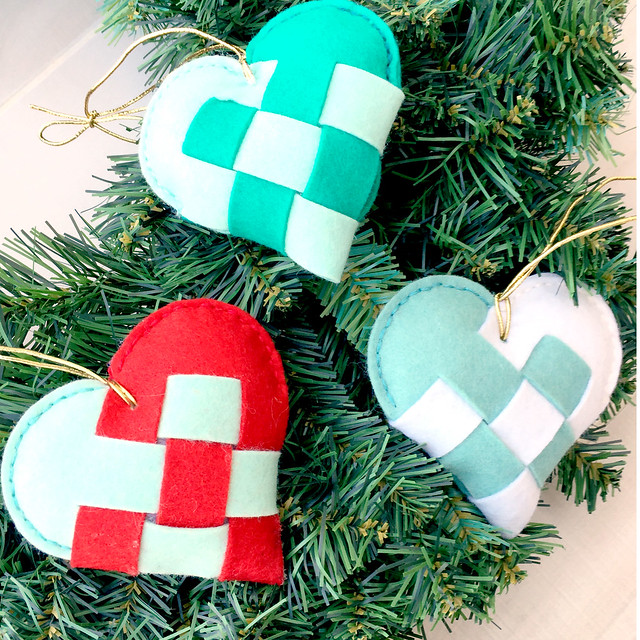
One more thing...the Woven Heart Dies. Yesterday I showed you how you can take these new dies and create non-sew felt ornaments for your tree and gift giving in this blog post With the addition of one little die in the collection, you can turn those woven hearts into stitched puffy hearts. Here's how:
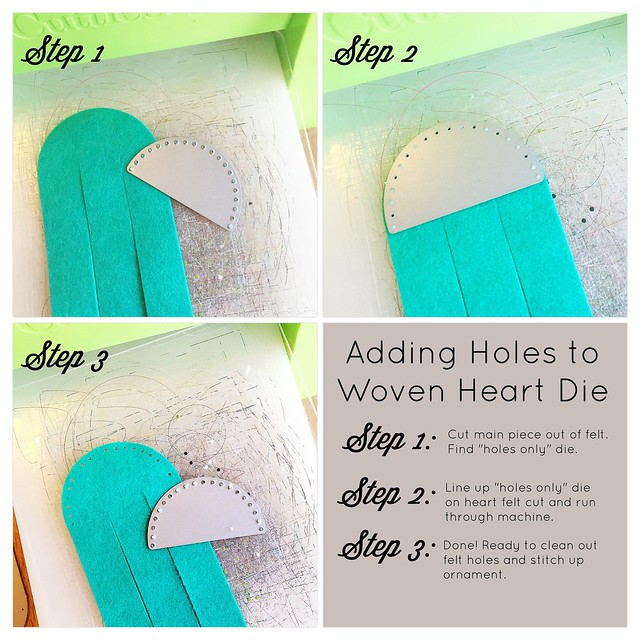
These are also super quick to make. I can easily make three of these an hour. And they look fantastic mixed in with all the other ornaments this month.
Alright. That's it! I hope you are as eager to make holiday ornaments as I am this year. Let me know what you make! Love seeing all this goodness out there.
The girls are featuring all the ornament themed product today. You can click through Nichole's blog post to see all the additional details and click through to more inspiration.
All these new dies will be available tomorrow night at 10 PM EST at www.papertreyink.com. Happy holiday crafting!
You are the stitching queen, Erin! Love,your designs and ideas.
ReplyDeleteForget knocking this out of the park - you've knocked it into orbit. Once again you have shown that inner engineer who thinks of all the aspects. The conservation of felt is fantastic, and this means I will actually, finally, be buying some Papertrey felt for these ornaments. Bless you for making a plain ball shape as my mind is running away with all kinds of die-cut felt-on-felt ideas.
ReplyDeleteThe additions to the truck and the car are inspired. If Erin's Felt Land were a real place, you'd find me living there. Thank you for taking up the mantel of Felt Queen!
A total wow from me, Erin! You've made a lot of stitchers happy this morning! :)
ReplyDeleteGood thing I ordered a ton of felt. Planning to do a whole lot of stitching! Erin, vintage glorious-ness! Whole lot of fun this season!
ReplyDeleteI'll be working my way through the football season stitching lots of ornaments! There's always instant replay if I miss something on the TV ;-) Thanks a million for the endless possibilities with these dies!
ReplyDeleteOh my word!!!!!!! Ingenius!!!!! And thank you thank you thank you for not making it a kit!!! I can buy them all in stages : D
ReplyDeleteerin, you have made my heart happy with these little treasures. and, thank you from me too for not making it a kit because what i can't purchase now can go on my wish list! also, how does one score an invitation to your holiday crafting party? well done! these are lovely.
ReplyDeleteHi Erin, what colors felt did you use for the beaded ornament? I love that blue. Thank you.
ReplyDeleteTropical Teal
Delete