Thursday, May 15, 2014

May Release Projects

Tonight is the night! The Papertrey Ink May Release goes live at 10 PM EST. The design team is wrapping it up this morning with the last of blog posts featuring the remainder of our projects. Let's get to it!


Phrase Play #4 and Oopsie Daisy. I think Oopsie Daisy might be on my short list of favorites. The dies make this one so much fun.


Splat, Oopsie Daisy, Scribbled Circle Dies: There's Oopsie Daisy again! This time a little more free form. I thought Splat would make an interesting flower center. And Scribbled Circle Dies make the best flower too. I stamped the back of that particular flower with the backside of a Splat stamp, so I would get the shape, but not the sentiment. BB: Random Stripe helps us out with a border. 


Monthly Moments: May and Smooth Alphabet: The polka dot border strip with the circle was really intriguing to me, so I went with that. A lot. :) In for a penny, in for a pound. 


Ballerina Beauty and BB: Venice: Here's our little prima ballerina practicing at a barre and on hardwood floor. A spotlight highlights her and BB: Venice adds an elegant touch to the wall. My Eliza loves this card, but keeps asking me the same question: "Mom, where is her hand?" Just doesn't quite understand the whole barre thing. And I've been hearing about it. A lot. LOL.


Wet Paint III: Everybody is CRAZY for Wet Paint.  Me too! I know a lot of you have the Shakers & Sprinkles kit. I have all the dies and stamps, but not the foam. Instead, I die cut several layers of the inner and outer frame here and built them up myself. Just an option for you. And I just happen to know of the perfect complimenting stamp set for this kit...Party Poppers:).


Summer Sweetness and Birthday Classics: June: I think just about every one of us teamed these two stamp sets together. We know a good thing when we see it. The popsicles are just delightful to play with.

Side note: Ya'll would have enjoyed the sight of me running down the middle of the street after the ice cream truck last week, waving my coffee jar of quarters over my head. I've heard about it from the neighbors ever since. What a mama does to make sure her kids can sit out on the front porch in pajamas and barefeet while enjoying a Kona Ice at 8 PM on a school night. All about making memories folks:).


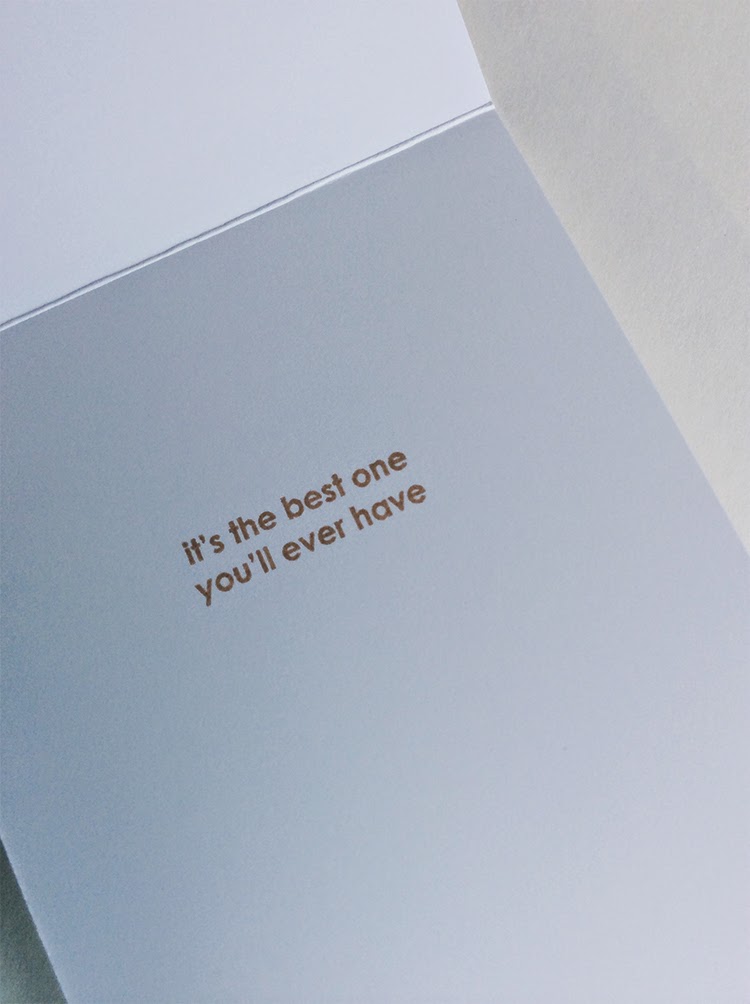
Clip Tips: I used a gridded block  (striped paper helps too) to line up all these anniversary themed phrases from Clip Tips for this card. Really like how it turned out. Used last month's Keep It Simple: Anniversary too.

And that's all folks. OVER and out. Whew. It's been a whirlwind. Enjoy shopping tonight. :) Thanks for stopping by my little place on the web.

More inspiration below:

Danielle Flanders
Ashley Cannon Newell 


Supplies

Enjoy This Special Moment
Stamps: Phrase Play #4, Oopsie Daisy, Bitty Background Blocks II
Dies: Phrase Play #4, Bitty Button Stackers, Oopsie Daisy
Cardstock: Spring Rain, Tropical Teal, Berry Sorbet, Soft Blush, Limeade Ice, Stamper's Select White
Ink: Berry Sorbet, Limeade Ice, Blueberry Sky

Hello Friend
Stamps: Splat. Oopsie Daisy, Splat, BB: Random Strip, Friends 'Til the End
Cardstock: Hawaiian Shores, Spring Rain, Aqua Mist, Hibiscus Burst, Stamper's Select White, Raspberry Fizz, Blueberry Sky
Ink: Raspberry Fizz, Aqua Mist, Blueberry Sky, Enchanted Evening, Tropical Teal
Dies: oopsie Daisy, Circle Scribbles, Pinked Border
Aqua Mist Button

Monthly Moments: June
Stamps: Monthly Moments June, Take Note, Polka Dot Basics, Turning a New Leaf
Cardstock: Stamper's Select White, Enchanted Evening, Blueberry Sky, Limeade Ice
Ink: Limeade Ice, Lemon Tart, Harvest Gold, Blueberry Sky, Enchanted Evening, New Leaf
Dies: Smooth Alphabet, Limitless Layers: 1.75" Circle, Turning a New Leaf
Harvest Gold Buttons

Ballerina Beauty
Stamps: Ballerina Beauty, BB: Venice, BB: Farm and Barn
Dies: Ballerian Beauty
Cardstock: Soft Blush, Classic Kraft, Stamper's Select White, Berry Sorbet
Vellum
Copics
Ink: Dark Chocolate and Classic Kraft

Celebrate Shaker
Stamps: Wet Paint III, Party Poppers
Cardstock: Hawaiian Shores, Winter Wisteria, Berry Sorbet, Aqua 
Mist, Plum Pudding, Aqua Mist, Melon Berry, Stamper's Select White
Patterned Paper: Berry Sorbet Simple Stripe
Dies: Party Poppers, Shakers & Sprinkles Kiy
Ink: Aqua Mist, Plum Pudding, Berry Sorbet, True Black

Summer Sweetness
Stamps: Summer Sweetness, Birthday Classics: June
Dies: Phrase Play #4, Summer Sweetness, Stitching Lines
Cardstock: Aqua Mist, Summer Sunrise, Berry Sorbet, Hibiscus Burst, Pure Poppy, Raspberry Fizz, Orange Zest
Ink: Raspberry Fizz, Pure Poppy, Summer Sunrise, Hibiscus Burst, Dark Chocolate

Clip Tips
Stamps: Clip Tips and Keep It Simple: Anniversary
Dies: Clip Tips
Cardstock: Stamper's Select White, True Black, Blueberry Sky
Spring Rain Simple Stripe

Wednesday, May 14, 2014

Life is Beautiful

We've made it the final day of the May 2014 Papertrey Ink countdown release. Whooo hoooo! Today we're featuring a set that I know a lot of you are excited about....Life is Beautiful. It features a gorgeous butterfly done in Nicole's signature style. It's simple, sophisticated, and versatile. All things you want in a stamp set. Oh...and of course...matching dies! Who doesn't love matching dies?


Nichole designed this set with techniques in mind. For my technique, I choose to use my Copics over stamped images to give them a brushed and blended look. On my detailed butterfly, I stamped it in Melon Berry and Summer Sunrise ink onto Soft Blush cardstock. Then I went over it with markers until I was satisfied with the look. Why don't I do this technique more often? Love it.

I also stamped a more simple butterfly in Melon Berry ink onto a Vintage Cream cardstock panel. I used some dies from the Shakers & Sprinkles kit to create an tilted frame and a border for my Keep It Simple: Sympathy sentiment stamped in Classic Kraft. 


Life is Beautiful also lends itself to more simple stamping as well. I decided to forgo the big butterfly stamps on this card and instead focus on the dies and the detail stamps. All the details were stamped on a solid butterfly die cut. I then used the more detailed die to create an overlay die cut, allowing the stamped details to peek through the opening. 

How about that gorgeous Delicate Detail Dies. Such a lovely base for a focal point. 

I pulled this color combo from my Color Board on Pinterest. I'm also surprised how refreshed my creativity feels when I do something like this. I definitely recommend. it. Soft Blush teamed up with Lemon Tart, Harvest Gold, Summer Sunrise, Orange Zest, and Terracotta Tile? Who'd have thought? 


Moving on, I've got one last Sweet Cheeks card for you today. I wanted to show you one of my favorite sentiments. A lot of time the focus is on how cute the baby is, welcome sweet baby, isn't the baby just the most precious thing ever...blah blah blah. Giggle. That darn baby is hogging all the attention. I mean, seriously kid. 

The arrival of a new bundle of joy heralds a transformation that deserves to be acknowledged...the one that turns ordinary, everyday, sane, irresponsible folks into parents. It's a BIG deal. It's been six years for me and sometimes I just don't recognize myself. I open my mouth and my mother comes out. So this one is a nod to the parents and this crazy journey that they are just now embarking on. Even if they have no clue at the time just what that entails. 


There is an "inside" sentiment to finish the thought. And ain't it the truth?

Okie dokie...that's it for me today. Thanks for stopping by. And big hugs for the enthusiasm yesterday over the Baby Bootie Dies. I'm a very lucky girl to work with a company like PTI. Nichole is so open to crazy, off the wall ideas. I love how she is so good about saying "yes" and taking a chance. It's that sense of "adventure" that brings things like the stitching dies to life. And thank goodness for it. And then there is you all out there who are creative adventurers yourselves. Thanks for hopping on this crazy train with me and being as excited about the stitching dies as I am. Love those things. Without your support, we'd have gotten off at the station awhile ago. Instead, it's full steam ahead. More good things to come. I am far from tapped out. :)

All the new products will be available tomorrow night at 10 PM EST at www.papertreyink.com. More inspiration below: 


Supplies

With Sympathy Card
Stamps: Life is Beautiful, Keep It Simple: Sympathy
Cardstock: Classic Kraft, Vintage Cream, Fine Linen
Vellum
Dies: Life is Beautiful, Shakers and Sprinkles
Ink: Melon Berry, Harvest Gold
Copics
Harvest Gold Vintage Buttons

Butterfly Detail Card
Stamps: Life is Beautiful
Cardstock: Aqua Mist, Soft Blush, Lemon Tart, Harvest Gold, Summer Sunrise, Aqua Mist, Stamper's Select White
Ink: Summer Sunrise, Orange Zest, Terracotta Tile, Hawaiian Shores
Dies: Life is Beautiful, Delicate Details

Let the Adventure Begin
Stamps: Sweet Cheeks, Journaling Accesories, Clip Tips
Dies: Sweet Cheeks, Smooth Alphabet, Clip Tips, Notebook Paper
Cardstock: Lemon Tart, Fine Linen, Stamper's Select White
Classic Kraft Patterned Paper
Harvest Gold Buttons 

Tuesday, May 13, 2014

Introducing Ultimate Baby Inspiration

Boy oh baby boy! And little girls too. Do I ever have goodies for you today. Are you sitting down? Because this is going to be HUGE.


For the May 2014 Release at Papertrey Ink, we've been keeping a little something under wraps until today's group post. How do stitching dies to make your own customizable and homemade felt baby booties sound for your next baby shower or sweet little someone? If you've been a fan of the Coin Purses, Clever Barrettes, and Coffee Cozy in the past, or if you just want to try something new...you are going to love these new die collections. They make whipping up these sweet little things so very easy.

A few specs on the booties. They are 3 and 1/2 inches long, which makes them a large size 1 in newborn footwear. The information I've gathered says that they will fit a 0-3 month old. I think that's a little off in the estimate. I would say a 3 to 5 month old could wear them with a pair of socks on.

How long does it take to make a pair of baby booties with these new dies? I would plan on 2 and 1/2 hours between cutting the felt, embellishing, and stitching. I have made eight pairs of these sweet things over the course of the last two weeks. I find it to be extremely relaxing at night to hand stitch them up while watching a few of my favorite television programs. I even cut a few pairs and took them on vacation with me last week. They are the perfect little project to keep your hands busy while supervising kids, watching television with the husband, waiting quietly, or sitting in the sun.

I have lots of video for you today. Click play to see how the Baby Bootie Die Collection works. And how easy they are to stitch together.


Also note a few of the extra little details I built into the dies. There are reinforcement stitches along the top flap where I thought the bootie would get a lot of wear and tear. Reinforce this area even further by adding Fray Check at the time of assembly. And there is also rectangular holes on both the instep of the bootie top and the bootie sole. This helps you keep track of making a left and right bootie as well as gives your stitching a starting and stopping point to keep the heel centered in the back.

I've come up with several ways to embellish these sweeties with two additional die collections to compliment. First off, you can add patches to the soles using the Baby Bootie Patch Collection.


Are those not adorable? Total, absolute sweetness. And here my husband is wondering about the origins of my recent bout of baby fever. Ahem...you don't have to look much further than these. Somebody have a baby quick so I can make them booties otherwise I'm going to have to do it! And my house is already a circus.


And I'm also introducing the Baby Bootie Detail Die Collection. This set allows you to customize your basic bootie created with the Baby Bootie Die Collection into four basic variations...and then some. So many possibilities. But we'll get to all that a little later.


Getting back to the star booties I showed you first above, I used them as the foundation for a "get well baby gift". I know a little guy who is going into surgery this morning. He needs a pair of good luck booties when he comes out to keep those footies warm in the hospital. So I took this package over to him a few hours ago.

My booties were created using a colorblock design in Spring Moss, Aqua Mist, and Blueberry Sky Felt. I used the Coffee Cozy Detail Dies to add stars to the tops. I carried the star theme over to the Berry Basket where I topped a diaper pin with a felt stitched star from my upcoming stamp set, Sweet Cheeks. I really thought it was neat to weave the pin through the holes in the basket. The second pin has this little guys' first initial out of the new Smooth Alphabet on a circle of Enchanted Evening cardstock.


Inside, I have a little get well note for him...and his parents. I remember what it was like to be a parent and have your baby need surgery. (My Hank had a heart cath procedure to fix multiple ventricular septal defects at the age of six months). I've got a little bit of a soft spot for what they are going through and wanted to let them all know I am thinking about them today. The monogrammed circle was carried over from the front of the Berry Basket. I stamped a sentiment from Healing Touches as well. 


Also included in the package is a matching onesie with the star from Coffee Cozy Detail Dies stitched in the same color felt and floss as the booties. I made sure I washed both my felt swatch and onesie before I sewed things up to prevent shrinkage down the line. 


Moving on, we don't want the girls to be left out. As you might have noticed in the video, I created a girl's version of the star bootie featured above using Raspberry Fizz, Winter Wisteria, and Royal Velvet felt and the Seasonal Stitches: Butterfly Dies.

Instead of a matching onesie, I had a loop of lingerie elastic that I like to use for newborn headbands. It was already machine sewn into a loop. I covered up the seam between two felt butterflies that I stitched up. So easy. I arranged the headband on the Boutique Accessory Card stamped with the new Super Chevrons and Boutique Accessory stamp collection.


Like the boys' version, I sewed in patches from the Baby Bootie Patch Collection as well.


You've seen me use previously released stitching dies to embellish the baby booties created with the Baby Bootie Die Collection. To customize them even further, I created the Baby Bootie Detail Die Collection. Within one die collection (all sold together) are dies to create four different types of shoe styles (and their variations) to build upon the baby booties you've made with the Baby Bootie Die Collection. I'll show you both a photo and a video on how to use each one. You can also refer to the file posted above to see how the four variations within the Baby Bootie Detail Die Collection are grouped together.


There is the Fringe Bootie/Moccasin. Video link to how-to here.


The Penny Loafer Bootie. Video link to how-to here. There is both a boy's and girl's version of these. You can also leave out the penny "opening" and have the thick cross strap serve as a foundation for embellishments.


The Spatted Bow Bootie. Video link to how-to here. Again, the eyelet oval makes a lovely foundation for additional embellishments.


And lastly, the Mary Jane/Button Strap Bootie. Video link to how-to here.

You have the option to thread the strap through the top of the bootie like the Aqua Mist Mary Janes. Or, you can opt not to die cut and stitch the strap opening and just button it down for the Button Strap Bootie in Dark Chocolate felt shown below.


So, what do you think? Are you as excited as I am over these things? You should have seen me back in March when I got the prototype dies. It was right in the middle of the March Release and I was up to my eyeballs making coin purses. Man, I dropped those like they were hot and had whipped up a bootie within a hour of getting the dies. I just needed to see how they worked! 

Just a few days after getting the original prototypes was my little sister's baby shower. My new nephew got a pair made out of Ocean Tides felt and embellished with a Smokey Shadow star and button. She knew I made them...but she didn't know I made MADE them.  It is sort of fun having that secret. And you are now in on the secret too. Nobody needs to know just how easy these are to make! You get the fun and ease of making them AND get all the kudos at the next baby shower for being so darn crafty and creative. :)


Before I leave you today and wrap up this mammoth blog post, I have a card using Sweet Cheeks stamps and dies and Lizzie's new Text Block: Baby. Also busting out the dies from the Shakers & Sprinkles kit. Man, those frames are awesome. You can see how the rectangular frame just about fits the text block. Close enough for me. And a handy little feature of the diaper pins from Sweet Cheeks (one I didn't factor in, but was pleasantly surprised by) was how you can "pin" them through things like I did here on the Aqua Mist inner frame. Love that!

I'm DYING to see everybody's projects. Click below for links to the other PTI'ers blogs.

Danielle Flanders 
Ashley Cannon Newell

Additional new product previews by:
Lizzy Jones
Melissa Bickford
Lexi Daly

Interested in adding these dies and stamps to your collection? Everything will be available to purchase at www.papertreyink.com on May 15th at 10 PM EST. Thanks for stopping by!

Supplies

Berry Basket Boy Star Gift Set
Stamps: Sweet Cheeks, Healing Touch
Dies: Baby Booties, Baby Bootie Patches, Coffee Cozy Detail Dies, Smooth Alphabet
Felt: Spring Moss, Blueberry Sky, Aqua Mist
Aqua Mist Buttons
Cardstock: Blueberry Sky, Enchanted Evening, Stamper's Select White

Butterfly Gift Set
Stamps: Super Chevron, Boutique Accessories
Dies: Baby Booties, Baby Bootie Patches, Seasonal Stitches: Butterflies, Boutique Accessory Card
Felt: Winter Wisteria, Raspberry Fizz, Royal Velvet
Raspberry Fizz Buttons
Cardstock: Winter Wisteria
Ink: Royal Velvet, Winter Wisteria

Fringe Booties
Dies: Baby Booties, Baby Bootie Patches, Baby Bootie Details
Felt: Lavender Moon and Winter Wisteria
Lavender Moon Button

Penny Loafer Booties
Dies: Baby Booties, Baby Bootie Details
Felt: Ocean Tides

Spatted Bow Botties
Dies: Baby Booties, Baby Bootie Details
Felt: Scarlet Jewel and Autumn Rose

Mary Jane Booties
Dies: Baby Booties, Baby Bootie Details, Bitty Button Stackers
Felt: Aqua Mist, Harvest Gold, Vintage Cream

Button Strap Booties
Dies: Baby Booties, Baby Bootie Details
Felt: Dark Chocolate
Dark Chocolate Button

Little Angel Card
Stamps: Sweet Cheeks
Dies: Sweet Cheeks, Shakers & Sprinkles Kit, Text Block: Baby
Cardstock: Spring Moss, Aqua Mist, Spring Rain, Stamper's Select White
Spring Rain Simple Stripe Pattern Paper
Ink: Blueberry Sky, Simply Chartreuse
Vintage Cream Button


Monday, May 12, 2014

Day 3 of Sweet Cheeks

I'm back with two more cards using my super cute new baby set from Papertrey Ink called Sweet Cheeks. Let's just hop right into it.


First up, an ombre row of diaper pins. The set comes with an open and closed diaper pin. I was originally kicking myself for not including another pin, one that opens in the other direction for more options, but then realized, I didn't need it.  Take a look and you'll see what I mean. The original open pin is all the way to left with the cow topper. I just rotated it 15 degrees or so to have it open in the other direction, as you see here with the fourth pin with the bear topper. The open end isn't as pointy, but I think only I really notice that. It totally works. YAY!

The sentiment is from Sweet Cheeks. It can be a reference to laundry. Or it could reference something else. We are talking diaper pins here. :) It's subtle enough to be open to interpretation. I stamped the Slide Frame in Soft Stone for an interesting background and to frame my sentiment.


Next up, a birthday card for an one year old. The animal toppers can be turned into Mylar balloons. All eight of these different animals are included in Sweet Cheeks. This card gives you a great chance to see them all. I stamped my sentiment from Sweet Cheeks and Wishes Do Come True on one of the new Instant Photo Dies.

More tomorrow. Group Posts start! I wonder what we all have in store for you:)? We sure like surprises, don't we?

More inspiration in the meantime below. And if you are interested in adding Sweet Cheeks and their matching dies to your collection, just a few more days to wait. They are available for purchase on May 15th at 10 PM EST at www.papertreyink.com.

Nichole Heady
Dawn McVey
Heather Nichols
Lizzy Jones
Melissa Bickford
Lexi Daly 
Melissa Phillips
Danielle Flanders
Ashley Cannon Newell


Supplies

Loads of Love Card
Stamps: Sweet Cheeks, Slide Frame
Cardstock: Stamper's Select White, Smokey Shadow
Ink: Simply Chartreuse, Aqua Mist, Hawaiian Shores, Blueberry Sky, Enchanted Evening
Dies: Sweet Cheeks

Sweet Cheeks Birthday
Stamps: Sweet Cheeks, Wishes Do Come True
Cardstock: Soft Stone, Stamper's Select White
Ink: Summer Sunrise, Simply Chartreuse, Harvest Gold, Blueberry Sky, Aqua Mist, Winter Wisteria, Orange Zest, Pure Poppy, True Black
Dies: Sweet Cheeks and Instant Photo Frames


Sunday, May 11, 2014

Day 2 of Sweet Cheeks

First and foremost, Happy Mother's Day to all you moms out there. I hope you get as pampered as possible and loved on by your kids oodles and oodles. I'm looking forward to the sweet smile Hank gives me and only me, early in the morning when he first gets up...one of Eliza's fierce hugs that she pours all her being into...and a few kisses blown in my direction from my Sully Bear. I don't need much. In fact, I pretty much get all three of those everyday. And everyday, I look forward to them like I've gone a week without. Seriously does not take much to melt my heart.


I've got one card for you today using my upcoming stamp set Sweet Cheeks, being released at Papertrey Ink on Wednesday night. I choose today to just use the safety pins and top them with something other than the animal toppers, as cute as they are. Here they spell out part of the sentiment on a 3x7 card with the Uppercase Block Alphabet dies. Imagine using buttons (either real or stamped), flowers, stitching dies, maybe some of the images from Tremendous Treats. Lots of possibilities. 

There's still a little room left over, so you could put "girl" on the bottom instead of "boy" by shifting everything over and adding a single diaper pin. 


And here's a sentiment from Sweet Cheeks. I try hard to bring you something new sentiment-wise when it comes to my stamp sets. I think this one fits the bill nicely. 

Gotta run. I need to go sit in a chair, relax, and watch everybody make me pancakes:). My job is tough today.

More inspiration below:


Supplies

Stamps: Sweet Cheeks
Cardstock: Aqua Mist, Hawaiian Shores, Classic Kraft, Fresh Snow
Ink: Aqua Mist, Hawaiian Shores
Dies: Smooth Alphabet, Uppercase Block Alphabet


Saturday, May 10, 2014

Day 1 of Sweet Cheeks

It's the first day of the May 2014 Papertrey Ink Countdown. I'm popping in here really quick (I have a fishing derby to get to...fun stuff) with two cards using my new Sweet Cheek stamp set. It features sweet little diaper pins and interchangeable animal toppers, as well as some new sentiments. Stamping with it has given me baby fever something fierce. My husband is begging me to stop! Good thing we're on baby watch for a new nephew, three days overdue. Not that we're counting or anything.


 Here's my first card. Did I mention dies? Sweet Cheeks has an coordinating die set, which makes creating these adorable diaper pins all that more fun. I created my background by layer Background Basics: Gingham and Ribbon Tails in Melon Berry on Soft Blush cardstock. I added some color to coordinate with my Berry Sorbet diaper pins using Faux Ribbon. The sentiment is from Sweet Cheeks as well.


And because we are going from the fishing derby to a birthday party for a 3 year old (oy...crazy weekends!!!), I need to whip up a quick birthday card this morning. The little animal toppers can be used for things besides a baby card. Here they sport party hats made from Tiny Triangles and reside within little frames from Just Smile. Three little guys for my three little guys.

That's it for me today. Stop by tomorrow for more. And remember, Sweet Cheeks and the dies are available on May 15th at 10 PM EST at www.papertreyink.com if you are interested in adding them to your collection:).

More inspiration below. Lots of good stuff this month.

Nichole Heady
Dawn McVey
Heather Nichols
Lizzy Jones
Melissa Bickford
Lexi Daly 
Maile Belles
Laura Bassen


Supplies

Pink Girl Card
Stamps: Sweet Cheeks, BB: Gingham, Ribbon Tails, Faux Ribbon
Cardstock: Soft Blush, Stamper's Select White
Dies: Sweet Cheeks
Ink: Melon Berry, Berry Sorbet

Happy Birthday Fellas
Stamps: Sweet Cheeks, Bitty Background Blocks, Tiny Triangles, Keep It Simple: Birthday
Ink: Melon Berry, Orange Zest, Limeade Ice, Soft Stone, Tropical Teal
Dies: Sweet Cheeks, Just Smile, Triangle Cover Plate, Birthday Trio
Cardstock: Tropical Teal, Stamper's Select White

Thursday, May 1, 2014

May PS DT Blog Hop

It's Pep Rally week and we are here today to share a sampling of the NEW Paper Smooches May/June release with you!  FOUR new stamps and EIGHT new dies are now available to purchase. You will find our new releases HERE
To add extra fun to our blog hop...we are offering up a prize! 
Since Paper Smooches is working along side of Xyron adhesives this week, they have a special prize to offer one random winner as well.  The prize is worth $100. To see a photo of the prize, please visit the PS blog.  You can visit the Xyron blog  to see what their fabulous team has created with our PS products.  While you are there, you will have a chance to win a $20. gift code to win some PS products!  
  • FOUR winners will be chosen at RANDOM from any of the design team blogs and the PS Blog
  • The prize - a $25. gift code to choose what you like at the PS online store.
  • Just leave a comment on any of the design team blogs listed below or the PS blog for your chance to win!  (you do not need to comment on all blogs to qualify but it increases your changes) 
  • You have until midnight MT on Sunday, May 4th to leave a comment. 
  • Please check the Paper Smooches blog on Monday, May 5th to see if you are one of the FIVE lucky winners.  (four PS winners and one Xyron winner)

To increase your chances of winning:
  • Tell us that you Facebooked about our blog hop
  • Tell us that you Tweeted about our hop
  • Tell us that you posted on your blog about our blog hop
(which means that you have up to three extra chances to win on each blog)


I was assigned to use the new Denim and Daisies stamp set. But ya'll know I just couldn't stop there.  Let's throw in three other new products along with it. I stamped the pocket and pocket details directly onto a white panel. I then created a slit with an Exacto knife so I could slip a tissue paper napkin and the fork and knife out of silver foil paper out of the Flatware dies.  The sentiment is from this month's TAM stamp set, Recipe For Success. And we have a cheery yellow flower from the Pocket dies. My button was glued down in a sec with Xyron's adhesive dots. Didn't even tie the thread, but rather let the adhesive hold everything in place for me. Gotta love a time saver.

Thanks for stopping by!